
Introduction
If you have a metal surface in front of you and a downstream process waiting — welding, coating, or inspection — this guide is written for you.
Skipping oxide removal before those processes is rarely a shortcut: it shows up later as weld defects, coating failures, and rejected parts.
What follows is a method-by-method procedural guide covering five approaches, each treated as a self-contained unit with the steps, equipment, and conditions you need to execute it.
A practical decision framework at the end helps you match the right method to your specific metal, oxide type, and facility.
TL;DR
Oxide removal is fundamentally a method-selection problem. The right approach depends on your metal type, the severity and character of the oxide, your part geometry, and what equipment you have available — and choosing wrong risks either leaving contamination behind or damaging the base material beneath it.
This article covers:

Five oxide removal methods: laser, pickling, abrasion, plasma, ultrasonic
Step-by-step process guidance for each method
Equipment and safety considerations per method
Matching the right method to your situation
When combining methods is necessary
A practical decision framework
Oxide Cleaning: What It Is and What to Assess
Pick the wrong method for your surface and you risk either leaving oxide behind or damaging the base metal beneath it — both outcomes create problems downstream that are harder to fix than the oxide itself.
Oxide is a surface layer that forms when metal reacts with oxygen in the environment. It is not the base metal — it is a distinct film sitting on top of it, with different physical and chemical properties.
The forms you will encounter in practice each have a name: rust is iron oxide on carbon steel; mill scale is the thick, blue-grey layer formed on steel during hot rolling; heat tint is the blue, gold, or brown discolouration that develops in the heat-affected zone during welding; and tarnish is the dull oxide film that forms on copper, brass, and bronze.
The goal of oxide cleaning is always the same: remove that surface film without removing what lies beneath it.
Why oxide removal matters before downstream processes
Oxide left in place does not simply stay put — it actively interferes with welding, coating, and inspection in ways that are costly to remediate after the fact.
Before welding, oxide inclusions resist fusion. Aluminium oxide has a melting temperature of 2,050°C — far higher than the aluminium base metal — so when it is present at the weld interface it resists melting into the weld pool and causes fusion defects, inclusions, and porosity. On stainless steel, heat tint signals that a chromium-depleted layer has formed beneath the surface; that depleted zone must be removed, not just the visible discolouration, to restore corrosion resistance.
Before coating, oxide is a weak interface waiting to fail. Mill scale on structural steel looks intact but is not permanently bonded to the substrate — coatings applied over it can delaminate, particularly outdoors, under thermal cycling, or under mechanical stress, once moisture penetrates the interface.
Before inspection, oxide and heat tint can conceal the very defects the inspection is designed to find. Oxide scale can mask surface discontinuities and prevent penetrant from entering cracks, producing unreliable results during dye penetrant inspection — which is why descaling is recognised as a prerequisite to accurate surface examination.
Heat tint on stainless steel welds indicates a chromium-depleted layer beneath the surface. Restoring corrosion resistance requires removing both — TWI notes that the best results are achieved by acid pickling, preferably preceded by grinding, because this removes the oxide, the depleted layer, and other susceptible surface areas.
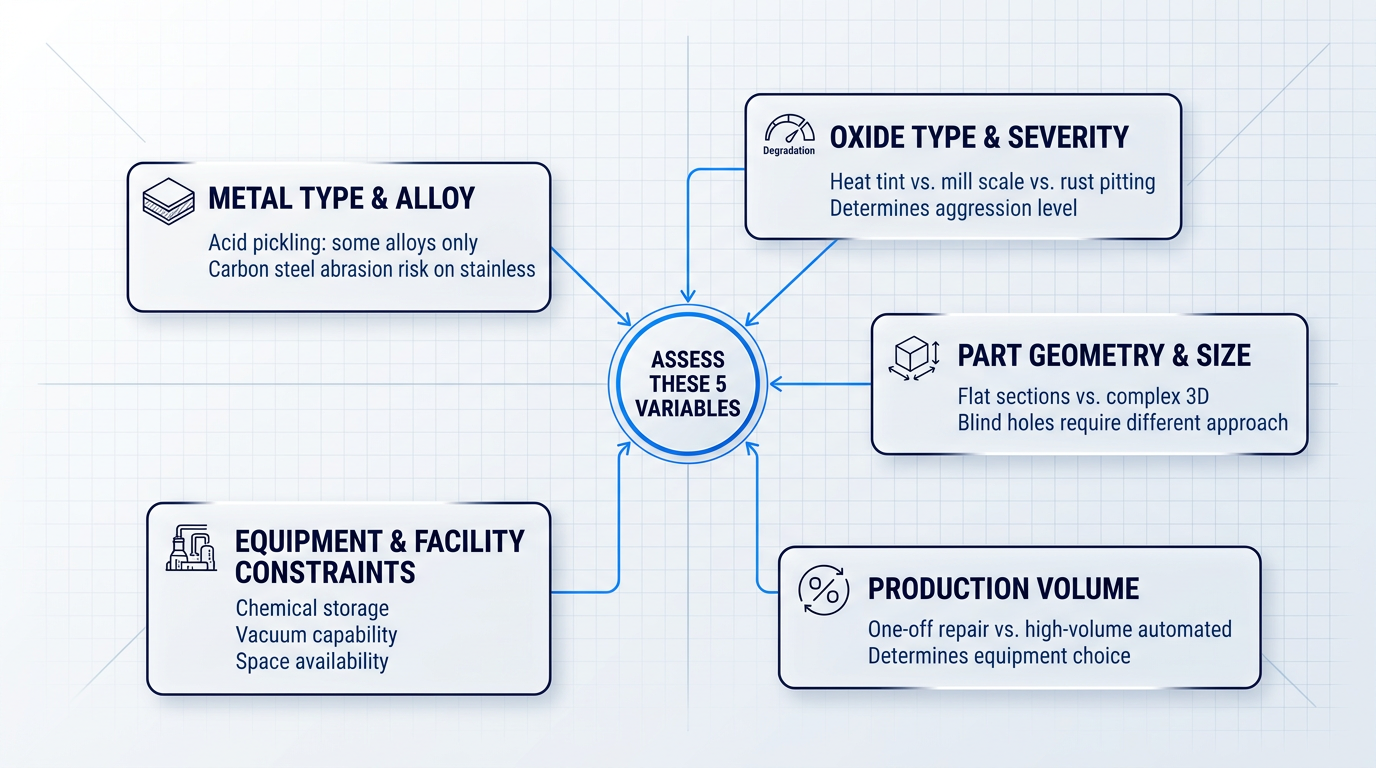
Before selecting any method, you need to assess five variables about your specific situation — these are the factors that determine which approach is appropriate and how aggressive it needs to be.
- Metal type and alloy: Method compatibility varies by substrate. Acid pickling suits some alloys but not all aluminium grades; mechanical abrasion on stainless steel risks contamination from carbon steel media.
- Oxide type and severity: Light heat tint or tarnish needs a different approach than heavy mill scale or deep rust pitting. Severity determines how aggressive the method must be.
- Part geometry and size: Large flat sections suit blasting or laser scanning; complex 3D parts with blind holes suit ultrasonic; confined weld seams suit laser or pickling paste.
- Production volume: One-off repairs favour handheld mechanical or portable laser; high-volume repetitive production favours automated laser lines or inline plasma treatment.
- Equipment and facility constraints: A workshop without chemical storage infrastructure rules out pickling; no vacuum capability rules out low-pressure plasma cleaning.
These five variables interact: a high-volume stainless steel tube application with confined weld seams points toward different methods than a one-off structural steel repair with heavy mill scale — even though both are oxide cleaning jobs.
The five methods covered in this guide each address a different combination of those variables: laser cleaning (precise, non-contact, suits confined seams and automation); chemical pickling (effective on chromium-depleted stainless and heavy scale, requires chemical handling infrastructure); mechanical abrasion (versatile and widely accessible, with contamination risk to manage); plasma cleaning (dry, inline-capable, suited to tube and pipe production); and ultrasonic treatment (excellent penetration on complex 3D geometries and small components).
With those variables assessed and the method landscape in view, here is how each process works in practice — starting with laser cleaning.
Step 1
Method 1: Laser Cleaning
Key Insights
Always test on scrap first.
Add passes before raising power.
Fume extraction is required throughout.
ELASER-RHZ works in open workshops.
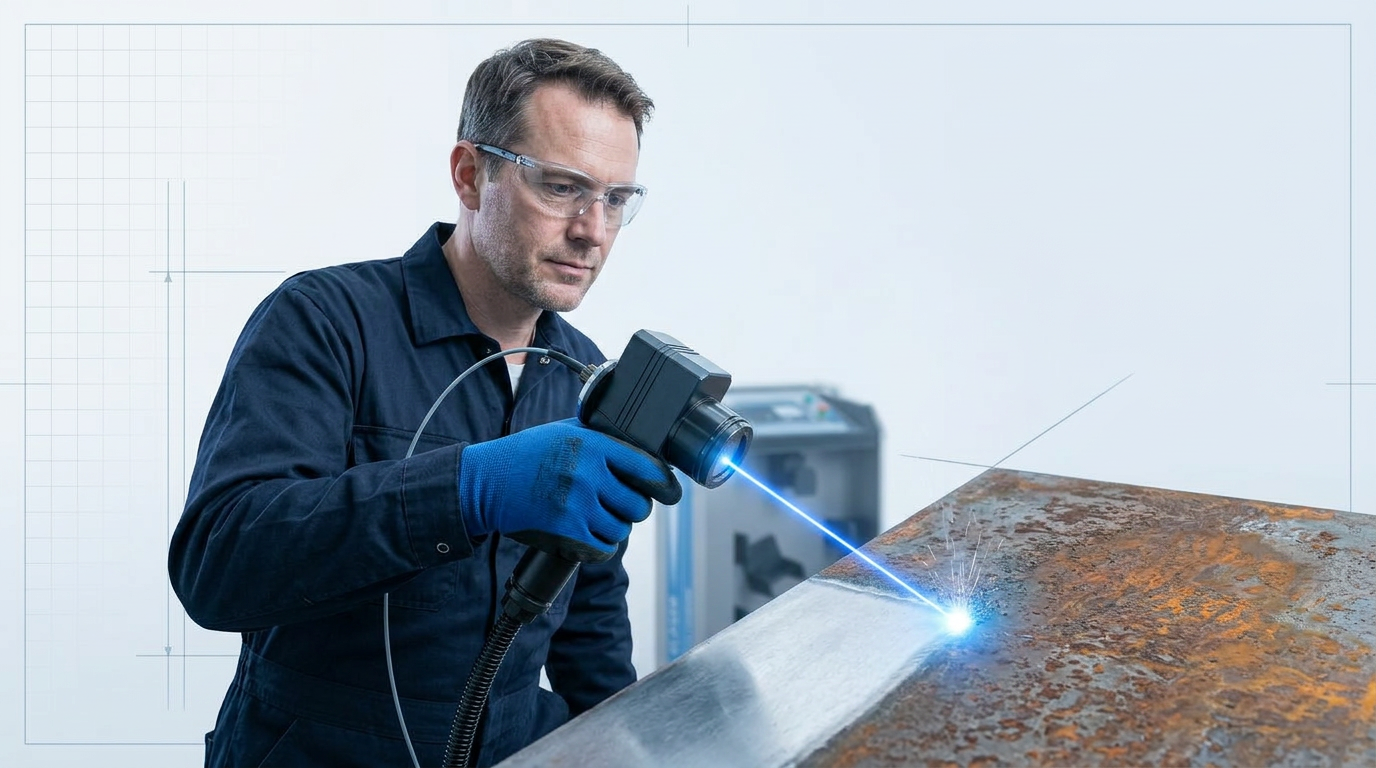
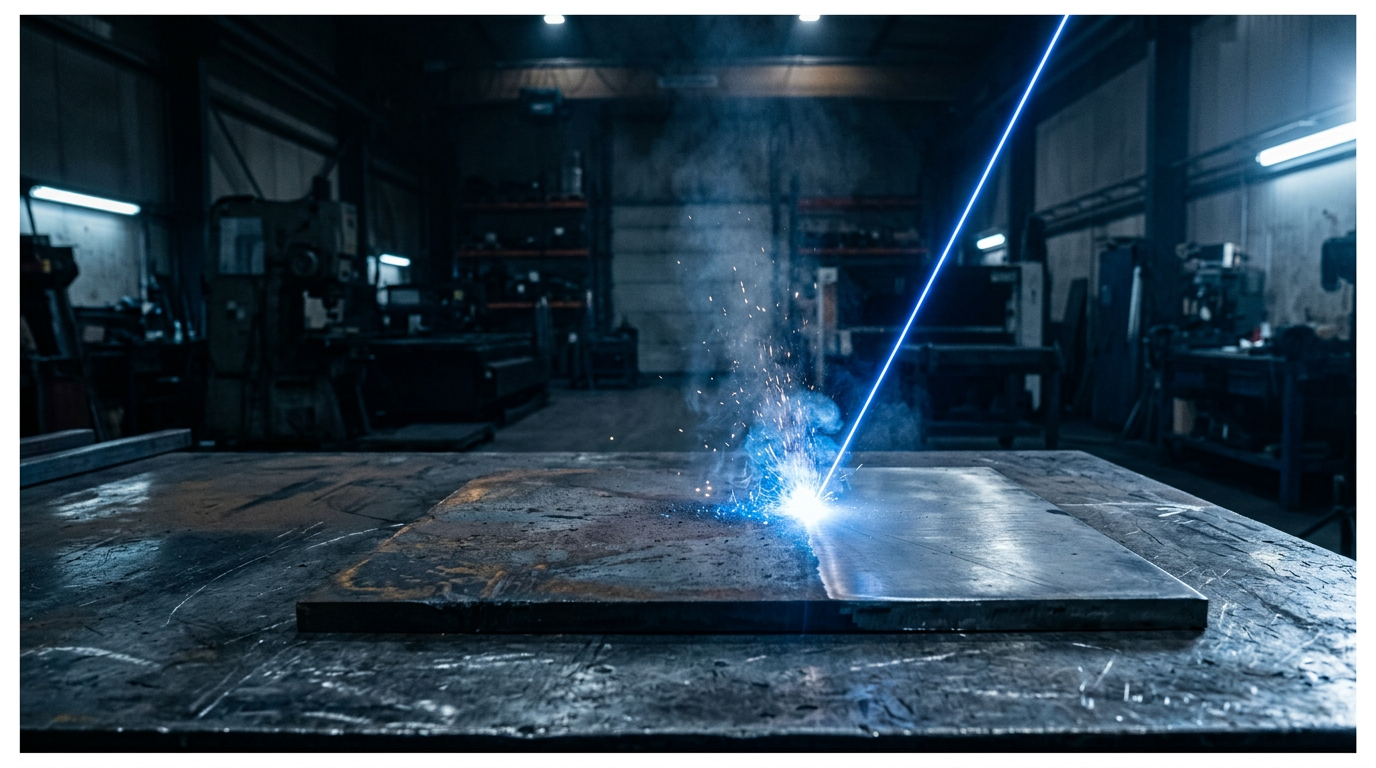
Laser cleaning works by exploiting a difference in how materials absorb energy: the oxide layer absorbs the laser beam at a much higher rate than the base metal beneath it, causing the oxide to vaporise or be ejected from the surface while the substrate remains largely unaffected.
This selective absorption is the reason substrate damage is minimal — the beam effectively stops at the base material, which means less rework compared to abrasive methods that cut into the substrate itself.
Equipment for Handheld Laser Cleaning
A fibre laser cleaning setup consists of four components: the laser unit, a delivery cable, a handheld scanner head, and a fume extraction system.
Our portable laser cleaning system, the ELASER, is a self-contained industrial unit built for exactly this procedure. The handheld scanner weighs under 3 kg, and the delivery cable reaches up to 50 m — giving a single operator genuine freedom of movement around large structures or fixed assemblies.
Power is tunable from 0–100% (up to 300 W), which means one machine handles everything from light post-weld heat tint through to heavy mill scale without swapping equipment. The system is air-cooled and consumable-free, so running costs stay low over time.
For open-workshop and mixed-use facility environments, the ELASER-RHZ variant is the standout option. It uses WSL's world-first reduced-hazard-zone technology to confine the laser hazard to a small area around the work, enabling cleaning without sealing off the surrounding area. No other laser cleaner currently offers this capability.
WSL is the only UK-based laser cleaning manufacturer: it designs, builds, services, and improves its machines entirely in-house. Many suppliers in this market are resellers rebadging imported hardware, which means slower support and no genuine ability to adapt the product. With WSL, engineering expertise is on-hand directly.
Laser Oxide Cleaning: Process Steps
Follow these steps in order. Parameter discipline — starting conservative and escalating incrementally — is what separates clean results from substrate damage.
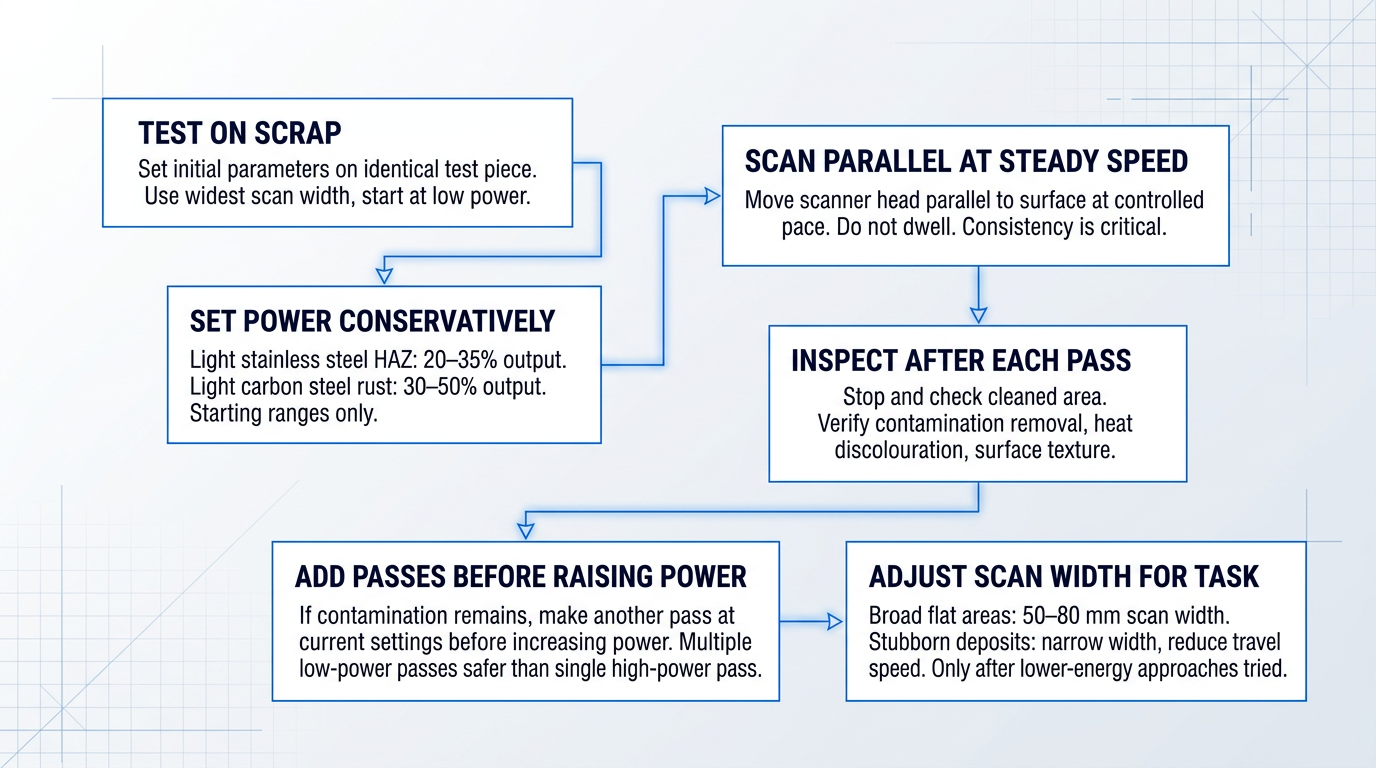
- Test on scrap first: Set initial parameters on a test piece identical in alloy, surface condition, and contamination type to your production part. Never begin on the actual workpiece. Use the widest available scan width and start at low power.
- Set power conservatively: For light stainless steel HAZ oxide, begin at approximately 20–35% of rated output. For light carbon steel surface rust, start at approximately 30–50%. These are starting ranges — not production settings.
- Scan parallel at a consistent speed: Move the scanner head parallel to the surface at a controlled, steady pace. Do not dwell in one spot. Inconsistent travel speed is the most common source of uneven results in handheld operation.
- Inspect after each pass: Stop and check the cleaned area before making another pass. Look for complete contamination removal, any heat discolouration beyond the cleaned zone, and surface texture changes.
- Add passes before raising power: If contamination remains, make another pass at current settings before increasing power. Multiple passes at lower power are safer than a single high-power pass, particularly on thin material or heat-sensitive substrates.
- Adjust scan width for the task: For broad flat areas, use a wider scan width (50–80 mm) to cover ground efficiently. For stubborn or thick deposits, narrow the scan width and reduce travel speed to concentrate energy — but only after lower-energy approaches have been tried.
Once you have validated parameters on the test piece, document them: power percentage, scan width, approximate travel speed, and number of passes. These become your reference for that material and contamination combination.
Metals and Oxide Types This Method Covers
Laser cleaning is applicable across a wide range of metals and oxide conditions.
- Steel and carbon steel: Light surface rust through to medium rust and mill scale.
- Stainless steel: Post-weld HAZ oxide and heat tint — one of the most common applications.
- Aluminium alloys: Bare oxide layer and anodised surface oxide removal.
- Copper, cast iron, and titanium: Surface tarnish and thermo-oxidised layers, including titanium oxide film from heat treatment.
The oxide range spans light surface tarnish at one end through heavy mill scale and post-weld heat tint at the other — the tunable power range of the ELASER is what makes a single system viable across all of these.
Fume Extraction: Required, Not Optional
Laser ablation generates metal oxide particulate and fume at the cleaning zone. Fume extraction must be active during operation — it is part of the procedure, not an afterthought.
NIOSH guidance indicates that nozzle distances beyond 2 inches allow significant fume escape. For sustained work, a system with HEPA or ULPA filtration is recommended. Reposition the nozzle as you move across the surface — do not let it lag behind the scanner head.
If smoke or residue is redepositing on the cleaned surface, the extraction nozzle is likely too far from the work zone or the power setting is generating more fume than the extractor can capture — reduce power and reposition before continuing.
When Laser Cleaning Is the Right Choice
Laser cleaning is particularly well-suited to precision applications where substrate damage must be kept to an absolute minimum — aerospace components, tight-tolerance weld prep, and post-weld finishing on stainless steel are typical examples.
It is also the practical choice for facilities that want to avoid the chemical storage, handling, and disposal requirements that come with acid-based cleaning methods. With no consumables and no chemicals, the total cost of ownership compares favourably over time despite the upfront capital investment.
For workshops that cannot shut down adjacent operations during cleaning, the ELASER-RHZ removes the biggest practical barrier: the reduced hazard zone means cleaning can proceed in open, shared environments without evacuating the area.
See Laser Cleaning in Action
Laser cleaning removes oxide without chemicals, abrasives, or substrate damage. Explore the ELASER range to find the right machine for your process.
Step 2
Method 2: Chemical Pickling
Key Insights
Only pickling removes the chromium-depleted layer.
Keep calcium gluconate gel on site.
Chemical pickling works by dissolving iron oxides and scale from the metal surface through direct acid attack. For stainless steel, pickling goes further: it removes the chromium-depleted layer that forms in the heat-affected zone during welding, which is the layer that mechanical methods cannot reach.
This distinction matters in practice. Grinding or wire brushing can remove visible heat tint, but the chromium-depleted zone beneath it remains — and that zone is where corrosion initiates. According to TWI, only acid pickling (preferably preceded by grinding) reliably removes both the oxide scale and the underlying chromium-depleted layer to restore full corrosion resistance.
Pickling is applied in two formats: paste application for on-site or localised work, and bath immersion for shop-based or production-volume processing. The acid chemistry used depends on the substrate.
Acids Used by Substrate
| Substrate | Common Acids | Notes |
|---|---|---|
| Carbon steel | Hydrochloric acid (HCl), sulphuric acid (H₂SO₄) | HCl and H₂SO₄ are the primary workhorses for descaling. Phosphoric acid variants also used — leave a phosphate conversion coating that provides some corrosion protection before painting. |
| Stainless steel | Nitric/hydrofluoric acid mixture (HNO₃/HF) | Standard bath: 10–15% HNO₃ with 0.5–3% HF. Pickling pastes typically contain approximately 20% HNO₃ and 5% HF by weight. HF is the component that dissolves the chromium-depleted layer. |
Organises acid chemistry by substrate type so the reader can immediately identify the right chemistry for their material — more scannable than prose for this comparative information.
HF-containing pastes carry a hazard distinct from general acid risk: HF is absorbed through the skin without causing immediate pain at lower concentrations, meaning exposure can go unrecognised. The California DIR notes that skin redness and burning may not appear for up to 24 hours after contact with dilute HF solutions.
Paste Application: Process Steps
- Allow the workpiece to cool completely: Do not apply paste to hot metal. Elevated surface temperature accelerates acid attack unevenly and increases fume generation.
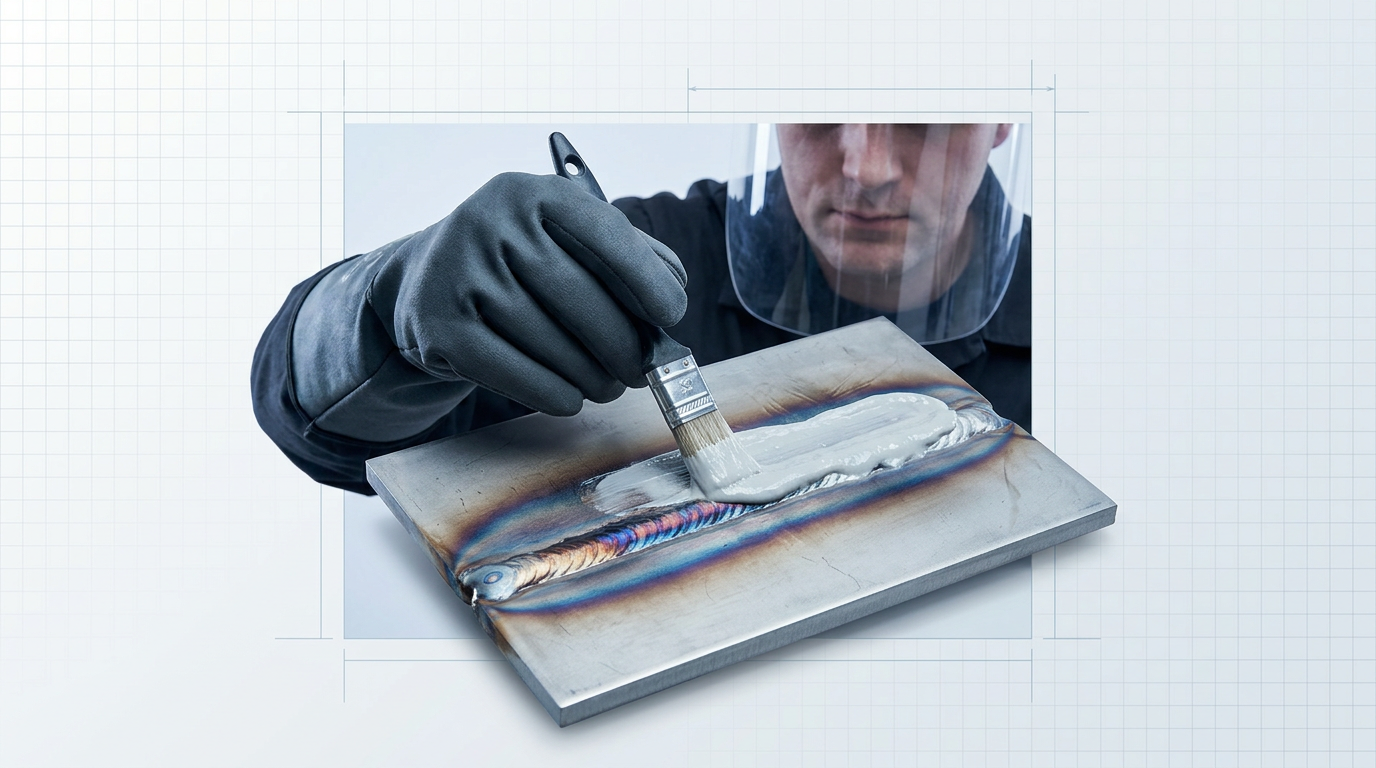
- Apply paste in a thick, even layer: Use a brush to apply paste across the weld bead and the full heat-affected zone. Thin or patchy coverage produces uneven pickling.
- Allow the correct dwell time: For conventional austenitic stainless steel with a 22 wt% HNO₃ / 5 wt% HF formulation at 20°C, dwell time is typically 1–4 hours. Follow product instructions — dwell time is not a 'more is better' variable. Over-pickling damages the substrate surface.
- Remove paste with a water rinse or pressure washer: Rinse thoroughly. Use demineralised water where possible — tap water can leave mineral deposits that initiate corrosion on freshly pickled stainless steel.
- Neutralise rinse water before disposal: Rinse water from pickling operations is acidic and metal-contaminated. Neutralise before discharge in accordance with local regulations — it must not enter public drainage untreated.
For larger fabrications that cannot be immersed, paste is the practical on-site format. The HSE notes that paste application is also appropriate where only localised pickling is required, such as on individual weld seams.
Bath Immersion: Process Steps
- Prepare the acid bath at the correct concentration and temperature: Concentration and temperature interact: higher temperature accelerates acid attack, which speeds the process but narrows the margin for error. Establish both parameters before immersing the workpiece.
- Immerse the workpiece fully: Ensure complete submersion so the acid contacts the entire surface uniformly. Partial immersion leaves a visible tide line and uneven surface finish.
- Monitor immersion time carefully: Over-pickling is a real risk, particularly on thin sections. Do not leave parts unattended in the bath. Remove as soon as the scale and chromium-depleted layer are dissolved.
- Rinse thoroughly with demineralised water: Tap water contains chlorides and minerals that can initiate corrosion on freshly pickled steel. Rinse completely to remove all acid residue.
- Prime or coat immediately after drying: Freshly pickled carbon steel is highly susceptible to flash rusting. Steelwork prepared by pickling should be primed as soon as it is dry and warm, with a minimum dry film thickness of 50 microns.
Bath immersion suits shop environments and batch production runs. The economics improve with volume — the setup and disposal overhead is the same whether you pickle one part or fifty.
Safety Requirements Before You Start
The following are requirements, not suggestions. Have all of these in place before any pickling work begins.
- Full-face shield: Not safety glasses. The HSE notes that acid splash injuries have resulted from paste passing behind safety glasses. A full-face shield capable of protecting the throat is required, particularly when applying paste overhead, spraying, or rinsing with a pressure washer.
- Acid-resistant gloves and protective clothing: Neoprene rubber gloves or gauntlets overlapping the sleeves for HCl/H₂SO₄ work. For HF-containing pastes, use chemical-resistant gloves rated for HF exposure — consult the SDS and PPE manufacturer for breakthrough protection times. Waterproof, acid-resistant clothing with elasticated cuffs.
- Ventilation: minimum 5–10 air changes per hour: Pickling generates acid fumes and hydrogen gas. Use local exhaust ventilation (LEV) for large-area work. Do not use pickling pastes in confined spaces without LEV or respiratory protective equipment — the HSE identifies this as an immediate serious health risk.
- Calcium gluconate gel and trained first aiders on site: Required whenever HF-containing paste is in use — not optional. The California DIR specifies that work with HF should only be permitted when calcium gluconate gel 2.5% is on hand. First aiders must be additionally trained in treating HF burns. HF is systemically toxic: even small skin exposures can cause electrolyte imbalances and cardiac arrhythmia.
Contaminated clothing must be removed immediately and neutralised with sodium bicarbonate solution before separate washing. Do not touch door handles or other surfaces with contaminated gloves.
Waste Disposal: A Real Planning Obligation
Waste disposal is the operational burden most facilities underestimate when evaluating pickling. Factor it into the total process cost before committing to this method.
Under US EPA regulations, spent pickle liquor from steel finishing operations is classified as listed hazardous waste K062 (40 CFR Section 261.32). Disposal must comply with RCRA requirements — this is not a matter of internal discretion.
Rinse water from pickling operations must not enter public drainage without prior neutralisation. It is acidic and metal-contaminated, and effluent limitations require pH to be maintained between 6.0 and 9.0 before discharge. HCl process facilities are also subject to NESHAP emissions standards under 40 CFR Part 63 Subpart CCC.
Spent pickle liquor and contaminated rinse water require licensed hazardous waste disposal. Tightening regulations mean disposal obligations should be costed into any pickling operation before it starts — not treated as an afterthought.
When to Use Pickling — and When Not To
Pickling is the right choice in specific, well-defined situations. Outside those situations, its operational overhead often outweighs its advantages.
| Use pickling when... | Consider another method when... |
|---|---|
| Stainless steel requires full corrosion resistance restoration after welding — pickling is not optional here | The facility lacks adequate ventilation infrastructure (minimum 5–10 air changes per hour) |
| Large fabrications or batch volumes make bath immersion economical | Chemical storage and licensed waste disposal capability are not in place |
| Carbon steel descaling where a phosphoric acid conversion coating is wanted before painting | Precision parts or thin sections where over-pickling risk is high |
| Small one-off jobs where setup and disposal overhead is disproportionate to the task |
A two-column table makes right-fit versus wrong-fit conditions immediately scannable — the reader can check their situation against both columns at a glance.
For corrosion-critical stainless steel applications, TWI's guidance is clear: for optimum corrosion resistance, mechanical cleaning followed by pickling is the recommended sequence — mechanical methods alone generally cannot produce comparable results.
Step 6
Method 3: Mechanical Abrasion
Key Insights
Pickling must follow for critical stainless applications.
Never use silica sand as blast media.
Keep the wheel moving — never dwell.
Inspect post-blast surface against SSPC-SP-10.
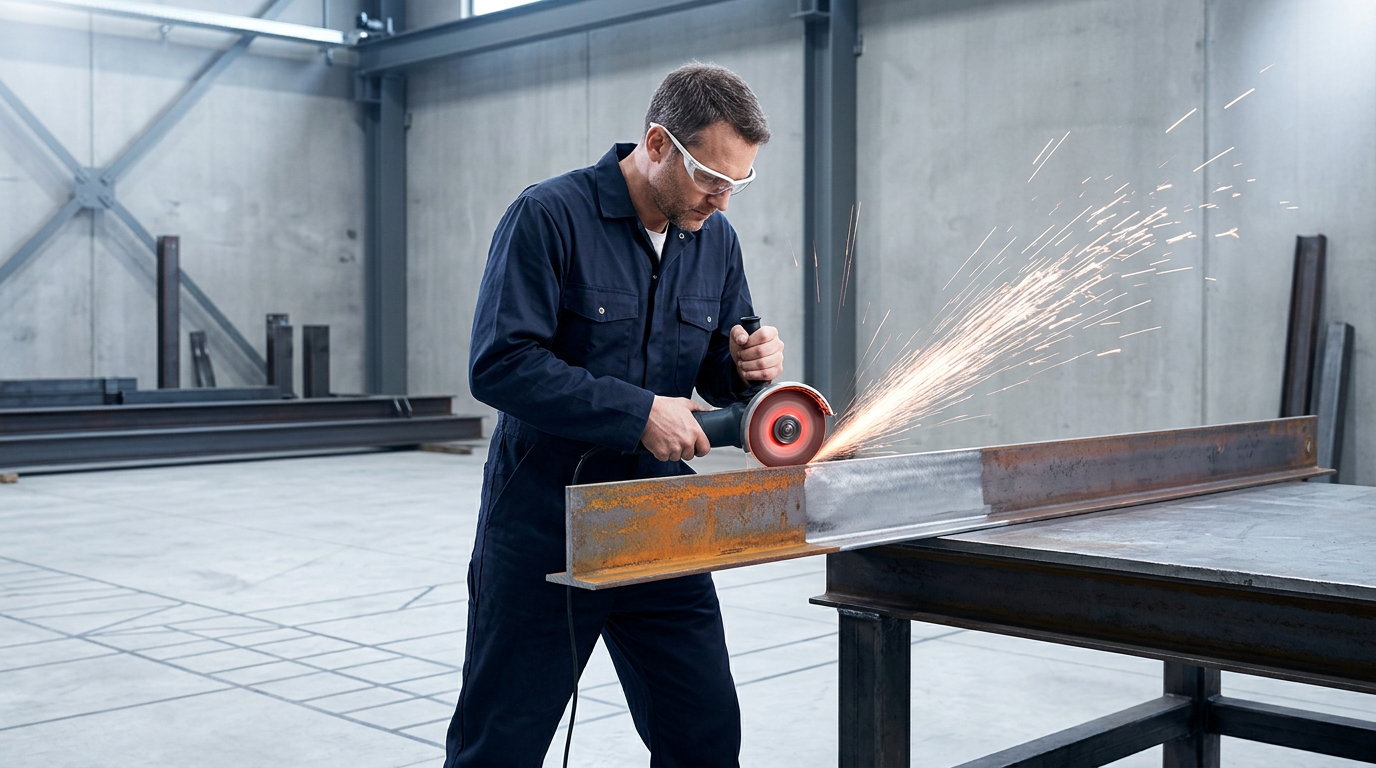
Mechanical abrasion covers three main tool categories: wire brushes for light oxide and weld spatter on accessible surfaces; angle grinders fitted with abrasive or flap discs for heavier scale, weld crowns, and stock removal; and abrasive blasting for large surface areas or complex geometries where consistent coverage is required.
Each category suits different oxide conditions and surface geometries — choosing the wrong one for the job adds time, risks substrate damage, or leaves oxide behind.
Wire Brushing
Wire brushing is the right choice for weld cleaning between passes, light oxide removal, and surface preparation where preserving base material dimensions matters — unlike abrasive products, wire brushes are not designed to remove base material.
- Select the brush type: Use a knot (stringer bead or cable-twist) brush for maximum aggression on tightly adhered oxide or weld spatter. Use a crimped brush where conformability to irregular or curved surfaces is needed.
- Match RPM to the tool rating: Check the maximum safe free speed (MSFS) marked on the brush. The brush's RPM rating must be equal to or greater than the tool's operating RPM — never exceed the published MSFS.
- Apply light, consistent pressure: The wire tips do the work. Apply only enough pressure to maintain contact — excessive downforce causes the sides of the wire to wipe rather than the tips to strike, reducing cleaning action and accelerating wire loss.
- Orient the brush correctly: Wheel brushes are designed to run perpendicular to the work surface. Varying this by even a few degrees increases lateral stress on the wire and reduces performance.
- Use dedicated brushes for stainless steel: Never use a carbon steel brush on stainless steel — carbon wire contamination will cause the stainless surface to oxidise and rust. Once a stainless brush has touched carbon steel, it must not be used on stainless again. Label or colour-code brushes to prevent mix-ups.
For stainless steel applications, keep brushes in closed containers when not in use and degrease them before critical operations to prevent surface contamination.
Angle Grinding
Angle grinding with abrasive or flap discs is the tool of choice for heavier oxide scale, weld crown removal, and surface blending — it removes base material and should be used only where that trade-off is acceptable.
- Select grit for the condition: Start with a coarser grit (40–60) for heavy weld seams or thick mill scale; use finer grits (60–80) for lighter oxide removal or coating preparation. Start with the finest grit that gets the job done — deep scratch lines from coarse grits require additional steps to remove.
- Set the correct approach angle: For a Type 27 flat grinding wheel, approach the work at 20–30 degrees. For a Type 29 conical disc, work at around 10 degrees. For a Type 28 conical wheel, operate at approximately 5 degrees. Too steep risks digging the wheel edge into the metal; too flat risks overheating a wide area.
- Keep the wheel moving — never dwell: Staying in one spot overheats the workpiece, causes pitting and gouging, and degrades the surface finish. Traverse the full length of the weld or oxide zone in one direction, lift the tool to allow cooling, then traverse again.
- Monitor heat input on thin sections: On thin material, heat builds quickly. If discolouration appears, stop grinding in that area and move to another section or a second workpiece, allowing the first to cool before continuing.
- Wear full PPE: Grinding generates sparks, swarf, and fine particulate. Use ANSI-rated eye and face protection together, hearing protection, respiratory protection appropriate for the material being ground, and a protective apron. Work in well-ventilated areas and direct sparks away from bystanders.
Before mounting any wheel, inspect it visually and perform a ring test — never mount a cracked or damaged wheel, and never exceed the speed marked on the wheel.
Abrasive Blasting
Abrasive blasting is the most operationally complex of the three categories, but it delivers consistent coverage across large or contoured surfaces that grinding and brushing cannot match efficiently.
- Confirm air pressure at the nozzle: Use a hypodermic needle-style nozzle pressure gauge inserted a few inches back from the nozzle with abrasive flow open. The reading should be 100 PSI or more — the minimum threshold for effective blast cleaning. Record the reading before starting the job.
- Select abrasive media for the substrate and required profile: Match media type and size to the substrate hardness and the surface profile depth required for the coating system. Using media that is too aggressive produces a deeper etch than the coating can fill, increasing waste and cost. Typical media for steel include steel shot, steel grit, aluminum oxide, garnet, and glass bead.
- Never use silica sand as blast media: NIOSH recommends that silica sand should not be used as an abrasive medium. Silica dust causes silicosis, lung cancer, and other serious respiratory disease. Use approved alternatives — the prohibition is not a preference, it is a safety requirement.
- Control feed rate and coverage: Move the nozzle at a controlled, consistent rate across the surface. Uneven feed rate produces inconsistent surface profiles and patchy cleanliness levels. On tube and pipe assemblies, rotate the workpiece to ensure all surfaces are reached evenly.
- Wear appropriate respiratory protection: For enclosed-space blasting, OSHA and NIOSH require a Type CE NIOSH-certified abrasive blasting airline respirator with a positive-pressure blasting helmet. Air-purifying respirators are not suitable for blasting operations.
- Inspect against SSPC-SP-10 near-white: After blasting, inspect the surface against the SSPC-SP-10 near-white standard — at least 95% of each square inch must be free of all visible residues including mill scale, rust, and oxides. This is the recognised cleanliness standard for most industrial coating applications.
Remove all visible dust after blasting by double blow-down with clean dry compressed air or HEPA-filtered vacuuming before applying any coating.
Wire brushing and abrasive blasting remove visible heat tint and oxide from stainless steel surfaces, but they do not remove the chromium-depleted layer that forms beneath the oxide during welding. According to TWI Global, only acid pickling achieves this. For critical corrosion environments, mechanical methods should be followed by the pickling process covered in the previous step. For general construction applications, blasting alone may be acceptable.
Mechanical abrasion carries real substrate trade-offs that explain why more controlled methods have gained ground for precision work.
Grinding removes base material alongside oxide — surface stress can be introduced, and on thin sections, heat input is a genuine risk. Abrasive media can embed in softer substrate surfaces, creating contamination problems downstream. On complex geometries with recesses, tight radii, or internal corners, consistent coverage is difficult to achieve with any of the three tool categories.
These are not edge cases — they are the normal operational conditions of the method, and they matter when selecting a process for precision or corrosion-critical applications.
Mechanical abrasion is well suited to large structural steel surfaces where cleaning speed matters more than surface precision, to situations where the equipment is already on-site, and to non-critical applications where some substrate material removal is acceptable.
Step 4
Method 4: Plasma Cleaning
Key Insights
Best for thin oxides, pre-bonding prep.
Not suited to heavy mill scale.
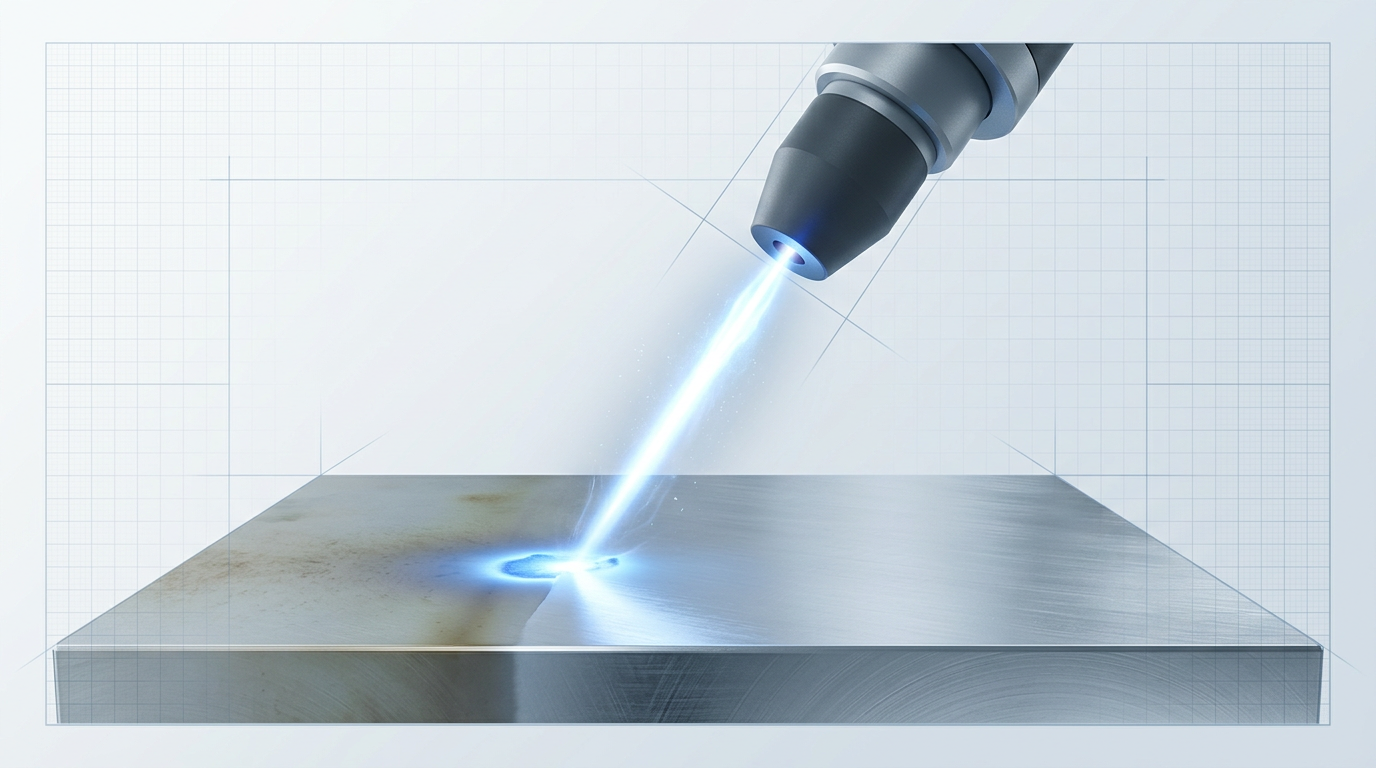
Plasma cleaning works by generating an ionised gas — plasma — whose reactive species attack the oxide layer through two simultaneous mechanisms: chemical reaction, where energised ions and radicals break down the oxide chemically, and physical ablation, where ion bombardment dislodges surface material directly.
Critically, the process is entirely dry — no liquid chemicals enter the cleaning zone, which is a meaningful practical distinction from pickling and most wet-process methods.
Atmospheric vs. Low-Pressure Plasma
Atmospheric pressure plasma requires no vacuum chamber, can be integrated inline in a production environment, and is the more accessible variant for electronics manufacturing and general precision fabrication.
Low-pressure (vacuum) plasma achieves deeper, more uniform surface treatment and is the established standard in semiconductor fabrication and high-precision electronics, where the controlled chamber environment allows tighter process control.
Gas Chemistry: Matching Gas to the Application
Gas selection is a process decision that directly determines what the plasma does to the surface — it is not a background setting.
- Oxygen plasma: Removes organic contamination and raises surface energy, activating the surface for bonding or coating. The preferred choice for pre-bonding and pre-coating preparation.
- Argon plasma: Delivers physical sputtering action, removing surface layers without chemical reaction. Used where chemical reactivity with the substrate is undesirable.
- Nitrogen/hydrogen mixtures: Chemically reduce metal oxides — particularly copper oxide on leadframes — without re-oxidising the freshly cleaned surface. A technically important distinction for electronics applications.
For copper and aluminium components in electronics manufacturing, nitrogen/hydrogen is typically the right choice because it reduces the oxide without introducing re-oxidation risk.
Atmospheric Plasma Process: Step by Step
- Position the nozzle at the correct working distance: Set the plasma nozzle or pen at the working distance specified by your equipment manufacturer — this distance is critical to treatment uniformity and varies between systems. Do not estimate it.
- Select gas type and power settings: Choose the gas appropriate to the oxide type: oxygen for surface activation and organic contamination removal; argon for physical sputtering; nitrogen/hydrogen for oxide reduction on copper or aluminium. Confirm power settings against the equipment specification for the substrate in question.
- Treat the surface at a controlled, consistent traverse speed: Move the nozzle across the surface at a steady, pre-determined speed. Dwell time and traverse speed together govern treatment depth and uniformity — inconsistent speed produces uneven results.
- Verify the result with a surface energy check: Confirm adequate cleaning and activation using a water-break test or contact angle measurement. A low contact angle indicates the surface energy has been raised sufficiently for bonding or coating to proceed.
When using oxygen plasma, be aware that ozone is generated as a byproduct — ensure adequate ventilation in the working area.
For production environments where chemical waste streams are unacceptable or impractical — including many electronics manufacturing lines — this is a decisive practical advantage over pickling and wet-process alternatives.
Because plasma operates at relatively low temperatures and removes no base material, it is well-suited to delicate components, tight-tolerance surfaces, and thin substrates that could not tolerate abrasive or high-energy methods.
When Plasma Cleaning Is the Right Choice
Plasma cleaning is a precision oxide cleaning method with a defined domain of advantage — it is not a general-purpose descaling tool.
- Pre-bonding and pre-coating surface preparation: Plasma raises surface energy, improving adhesion of adhesives, coatings, and encapsulants. This is the primary driver for its use in precision assembly.
- Electronics and semiconductor manufacturing: PCB substrate preparation, leadframe cleaning, and die bonding preparation are the canonical applications — environments where surface cleanliness directly affects product reliability.
- Thin oxide layers on copper, aluminium, and stainless steel: Plasma is effective on light oxide conditions. It is not suited to heavy mill scale or thick rust — those require laser ablation, abrasive blasting, or pickling.
- No-waste-stream production environments: Where liquid chemical handling or disposal makes wet-process oxide cleaning impractical, atmospheric plasma offers a viable dry alternative.
Throughput is lower than laser or abrasive blasting for large surface areas, and the method requires specialised equipment — both are real constraints to weigh when evaluating plasma for a given application.
Step 5
Method 5: Ultrasonic Cleaning
Key Insights
Cavitation cleans blind holes no abrasive reaches.
Use acidic solution, not alkaline.
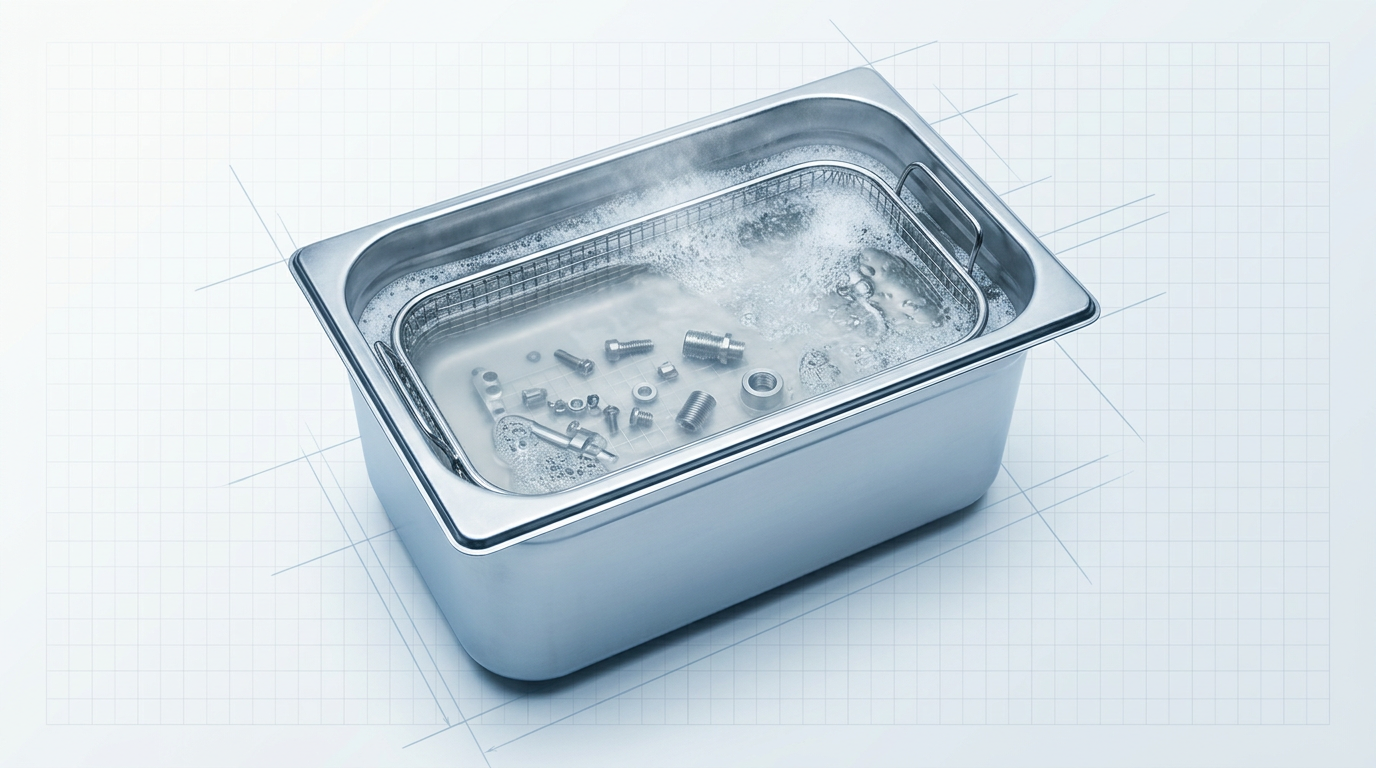
Ultrasonic cleaning works by driving high-frequency sound waves through a liquid bath, causing millions of microscopic bubbles to form and implode violently against the metal surface — a process called cavitation.
Each implosion releases a highly localised burst of pressure and heat that blasts oxide, scale, and contamination free from the surface — including from blind holes, threaded bores, and internal passages that no brush, abrasive, or nozzle can physically reach.
Lower frequencies (around 25 kHz) produce larger, more energetic bubbles suited to heavy oxide deposits on robust parts. Higher frequencies (45-80 kHz) produce smaller, gentler bubbles that penetrate finer crevices and intricate contours without damaging delicate surfaces. Match the frequency to the part's geometry and oxide severity before you start.
Solution chemistry is equally important: for oxide removal, choose a mildly acidic concentrate effective against oxide films, rust, and lime deposits on stainless steel, aluminium, and brass. Alkaline solutions target oils and greases, not oxide — using the wrong chemistry limits results regardless of frequency.
Equipment Setup Before Loading Parts
Complete the following setup sequence before any parts go into the tank.
- Fill the tank to the operating level: Fill to the level marked on the tank — overfilling or underfilling both affect cavitation performance.
- Add cleaning concentrate at the recommended dilution: Follow the solution manufacturer's dilution ratio precisely. Incorrect concentration reduces cleaning effectiveness and can damage parts.
- Run degas mode: Before loading any parts, run the degas cycle to drive dissolved and trapped air out of the solution. Air in the bath inhibits cavitation; skipping this step is the most common reason first-time users get poor results.
- Set the operating temperature: Elevated temperature — typically in the 40-60°C range depending on solution type — improves oxide removal efficiency. Confirm the correct setting with your solution manufacturer.
With setup complete, load and run the cleaning cycle in the sequence below.
- Place parts in the basket — never on the tank floor: Direct contact with the floor damps transducer energy and risks damaging both the parts and the tank lining.
- Ensure full immersion with no part-to-part contact: Parts touching each other create shadowed zones where cavitation cannot reach. Spread parts so solution circulates freely around all surfaces.
- Orient blind holes and deep features vertically or diagonally: Horizontal orientation traps air inside recesses, blocking cavitation from penetrating them. Angle the part so solution can flow in and bubbles can escape.
- Run the cycle for an appropriate duration: Cycle time varies with oxide severity and part geometry — treat it as a variable to test rather than a fixed prescription. Inspect after an initial run and extend if needed.
- Inspect the result: Check all surfaces, including recesses, before moving to the rinse stage.
- Rinse with demineralised water: Tap water can leave mineral deposits on precision surfaces. Use demineralised water to remove chemical residues and loosened contamination.
Ultrasonic cleaning suits a specific set of situations — and is the wrong choice when part geometry or scale falls outside them.
- Complex geometry: blind holes, threads, internal passages: Cavitation reaches surfaces that defeat every surface-contact method. This is the core advantage and the primary reason to choose ultrasonic cleaning.
- Batch cleaning of small to medium precision components: Multiple parts can be cleaned simultaneously in the basket to a consistent standard — practical for high-mix, low-volume production.
- Pre-plating or pre-inspection surface preparation: Where a chemically clean, residue-free surface is required, ultrasonic cleaning in an appropriate acidic solution delivers the surface condition reliably.
- Parts that cannot tolerate abrasive contact: Delicate surfaces, soft metals, and tight-tolerance features that would be damaged by mechanical abrasion are well suited to this method.
The method has clear boundaries: parts must physically fit the tank, which makes it unsuitable for large structural components. Flammable solvents must not be used in open ultrasonic tanks — use water-based concentrates formulated for ultrasonic use. For soft metals or highly polished surfaces, use higher frequencies; lower frequencies can pit or mark delicate finishes.
Not Sure Which Method Fits Your Process?
You've covered all five oxide removal methods. If you'd like to talk through which approach suits your materials, volume, or setup, our team is available to help.
Step 6
Choosing the Right Oxide Removal Method

Key Insights
Metal type drives the decision.
Pickling is non-negotiable for stainless.
You now know what each method does. The question is which one fits your situation — and that depends on five practical filters, not method preference.
| Decision Axis | Your Situation | Recommended Method(s) |
|---|---|---|
| Metal type & corrosion requirements | Stainless steel — full corrosion resistance must be restored | Pickling (removes chromium-depleted layer) |
| Metal type & corrosion requirements | Carbon steel for coating prep | Blasting or laser |
| Metal type & corrosion requirements | Aluminium pre-weld | Laser or ultrasonic |
| Metal type & corrosion requirements | Copper or brass components | Ultrasonic or plasma |
| Oxide severity | Light tarnish or HAZ oxide | Laser or plasma |
| Oxide severity | Medium rust or post-weld scale | Laser or pickling |
| Oxide severity | Heavy mill scale or thick rust deposits | Blasting or high-power laser |
| Oxide severity | Thin-film precision oxide | Plasma or ultrasonic |
| Part geometry | Large flat structural surfaces | Blasting or laser |
| Part geometry | Complex 3D parts with blind holes | Ultrasonic |
| Part geometry | Weld seams on large fabrications | Laser or pickling paste |
| Part geometry | Inline production components | Laser (automated) or plasma |
| Production volume | One-off or small batch | Handheld laser or mechanical |
| Production volume | High-volume repetitive production | Automated laser or inline plasma |
| Production volume | Batch of small precision parts | Ultrasonic |
| Facility constraints | Open workshop, no chemical infrastructure | Laser (ELASER-RHZ) |
| Facility constraints | No chemical storage or disposal capability | Laser or mechanical |
| Facility constraints | No vacuum equipment | Atmospheric plasma or laser |
Maps the five decision axes directly to recommended methods, giving the reader a scannable reference tool to identify their situation and reach a recommendation without re-reading the method sections.
Notice that metal type often overrides every other axis — particularly for stainless steel in corrosion-critical applications, where the method choice is not about oxide severity or geometry but about whether the chromium-depleted layer must be addressed.
For those applications, pickling is the only method that removes the chromium-depleted zone left behind by welding heat — mechanical abrasion cleans the surface but cannot restore the passive layer beneath it.
When to Combine Methods
On corrosion-critical stainless steel work, grinding followed by pickling is the established two-step combination: grinding removes the bulk oxide and weld crown, then pickling addresses the chromium-depleted layer that grinding leaves behind.
In many non-critical applications, laser cleaning can replace both steps in a single pass — eliminating the chemical handling and disposal that the pickling stage requires.
Where Laser Cleaning Resolves the Core Tension
The fundamental challenge in oxide cleaning is selectivity: removing the contamination without touching the substrate beneath it.
Laser cleaning addresses this directly — the beam stops at the base material, and tunable power from 0–100% (up to 300 W) means a single machine handles light surface tarnish through heavy mill scale without changing equipment.
There are no consumables, no chemical waste streams, and no media to clear up — which also means the total cost of ownership holds up well against methods that look cheaper upfront.
For open-workshop environments, the ELASER-RHZ removes the practical barrier that has historically made laser cleaning impractical in shared facilities: WSL's world-first reduced hazard zone technology collapses the laser hazard zone to a fraction of conventional size, so cleaning can proceed in open or mixed-use spaces without sealing off the area.
The ELASER's tunable power, zero consumables, and — in the RHZ variant — world-first reduced hazard zone technology make it the strongest all-round choice across the widest range of oxide cleaning situations, including open-workshop environments where conventional laser cleaning was previously impractical. WSL designs and builds its machines in-house in the UK, which means genuine engineering support, faster spares, and a system that improves over time.
Conclusion
Oxide Removed — What Comes Next
You now have a complete procedural map: five methods, a decision framework, and enough practical detail to match the right approach to your specific surface, oxide, and setup.
The target is a surface that's uniformly bright, with no visible scale, tarnish, or heat tint in the treatment zone — ready to weld, coat, or inspect with confidence.
Run your chosen method on a test piece first, verify the result, then commit to production. For those taking the laser cleaning route, the ELASER is the portable, self-contained option built for both workshop and on-site use.
Frequently Asked Questions About Oxide Cleaning
Practical answers to the questions fabricators and industrial professionals most commonly ask about oxide cleaning methods, verification, and method selection.
Laser cleaning works across a wide range of metals, including steel, carbon steel, stainless steel, aluminium alloys, copper, brass, bronze, titanium, cast iron, and galvanised steel. The same machine handles all of these — but parameters such as power, scan speed, and scan width must be matched to the specific material and oxide type. Settings that work well on mild steel scale will not be appropriate for aluminium or thin stainless. Testing on scrap material before committing to a full run is standard practice for any new substrate or oxide condition.
The primary check is visual inspection: the treated surface should be uniformly bright with no visible scale, tarnish, or heat tint remaining in the treatment zone. For most applications, this is sufficient. For stainless steel in corrosion-critical applications — food processing, marine, or medical fabrication — visual inspection alone may not be enough. Two additional tests are worth knowing: the water-break test, where clean stainless sheets water evenly rather than beading, indicates surface cleanliness; and the ferroxyl test, which detects free iron on the stainless surface that would compromise the passive layer. ASTM A380/A380M covers the standard for stainless steel cleaning and descaling, and TWI's guidance on heat tint removal outlines when these verification steps are warranted.
Yes — wire brushing, grinding, and blasting will remove the visible oxide layer from stainless steel. The critical limitation is that mechanical abrasion does not remove the chromium-depleted layer beneath the oxide. That depleted layer is what causes corrosion resistance to fail, and it is invisible to the eye. For applications requiring full corrosion resistance restoration — food processing, pharmaceutical, or marine environments — mechanical methods must be followed by acid pickling to remove the chromium-depleted zone and restore the passive layer. One additional point: wire brushes used on stainless steel must be kept strictly separate from those used on carbon steel. Carbon steel particles embed in the stainless surface and initiate corrosion.
Fume extraction is required during laser cleaning operation. The extraction nozzle should be positioned close to the cleaning zone to capture vaporised contaminants at source, before they can disperse into the workshop atmosphere. For sustained oxide or coating removal work, a shop-level filtration unit is recommended rather than a basic dust extractor — continuous operation generates a particulate and vapour load that a standard unit is not rated to handle. Proper extraction serves two purposes: it protects the operator from inhaling vaporised material, and it prevents redeposition of contaminants onto the freshly cleaned surface, which would compromise the result. CDC/NIOSH guidance on laser-generated airborne contaminants supports close-capture extraction as the primary control measure.
No. Ultrasonic cleaning requires parts to be fully immersed in the cleaning tank — the component must fit within the tank's dimensions and be completely submerged for cavitation to act on all surfaces. Large structural fabrications such as beams, frames, and weldments cannot be accommodated in standard ultrasonic tanks. Where ultrasonic cleaning excels is on small and medium parts with complex geometry — blind holes, thread roots, and intricate contours that no surface-contact method can reliably reach. For large structural components, the appropriate alternatives are abrasive blasting, laser cleaning, or chemical pickling paste applied directly to the weld zone.
There is no single best method — the right choice depends on the metal type, oxide severity, part geometry, production volume, and available equipment. The decision typically follows these axes: stainless steel requiring full corrosion resistance restoration needs acid pickling, since it is the only method that removes the chromium-depleted layer; large structural steel is best handled by abrasive blasting; complex small parts with blind holes or intricate geometry suit ultrasonic cleaning; and precision or open-workshop applications where chemicals and abrasives are impractical point toward laser cleaning. Laser cleaning is worth specific consideration where selective removal without substrate damage, no consumables, and no chemical handling are priorities — but it is one honest answer among several, not a universal solution.
In an industrial context, oxide cleaner refers to any process or agent that removes oxide layers from metal surfaces — rust, mill scale, heat tint, and tarnish all fall under this category. It is not a specific branded product; it describes a method category. Five main approaches are used in practice: laser cleaning, which vaporises the oxide layer with a focused beam; chemical pickling, which dissolves oxides using acid solutions or pastes; mechanical abrasion, which removes oxide physically through grinding, brushing, or blasting; plasma cleaning, which uses ionised gas to break down thin oxide films; and ultrasonic treatment, which uses cavitation in a liquid bath to dislodge oxide from complex part surfaces. Each uses a different mechanism, but the outcome is the same: a clean, oxide-free metal surface ready for welding, coating, or inspection.
Yes — dilute acetic acid (vinegar) can dissolve light surface oxide on some metals. Copper, brass, and mild steel all respond to it. The mechanism is the same as industrial pickling: the acid reacts with and dissolves the iron oxide layer. Steel descaling in vinegar vats is documented from the late 1700s and represents the historical origin of pickling as an industrial process. The practical limitations are significant, however. Vinegar is not a controlled industrial method — concentration, temperature, and dwell time are uncontrolled compared to formulated acid solutions, so results are inconsistent. It is not suitable for stainless steel, where it risks surface attack without restoring the passive layer. It is also unsuitable for any precision application where surface finish and dimensional tolerance matter. For anything beyond light hobbyist descaling, industrial pickling solutions deliver the consistency and control that vinegar cannot.