
Introduction
Whether you are restoring a set of alloy wheels, bringing life back to a neglected engine casing, tackling faded marine aluminium, or simply trying to salvage outdoor furniture or kitchen cookware, oxidised aluminium is one of those problems that looks worse than it is.
By the end of this guide, you will know which method fits your surface and how to apply it without making things worse — whether that means a gentle household solution, a targeted chemical cleaner, or a mechanical approach for heavier build-up.
It is a common, well-understood problem, and the fix is straightforward once you match the method to the material.
TL;DR
The most important decision in removing oxidation from aluminium is not how hard you clean — it is how well you match the method to the surface.
Reach for the right approach at the right severity level, finish with a protectant, and the result will last far longer than brute force ever would.
This article covers:

Assessing oxidation severity and choosing the right method
Chemical cleaning: commercial and household DIY options
Mechanical methods for heavy oxidation
Surface-specific guidance: anodised, rims, engine, marine
Rinsing, neutralising, and drying correctly
Post-clean protection and ongoing maintenance
Assess the Damage and Gather Your Materials
Reaching for the strongest cleaner you own is the most common mistake when removing oxidation from aluminum — an aggressive method on a light haze can cause more damage than the oxidation itself, and stopping mid-procedure to hunt for a cloth can ruin a chemical treatment that needed rinsing two minutes ago.
Start by inspecting the surface in good light. Run a clean cloth across it and look at what transfers — the result tells you exactly which treatment tier you need.
- Light haze: Dull, slightly grey surface with uniform loss of brightness. Treat with a chemical cleaner or household acid in a single pass.
- Moderate chalky film: White powdery residue transfers to a cloth when wiped; surface looks chalky. A chemical cleaner works, but may need two passes.
- Heavy crust: Thick white buildup with rough texture that does not wipe off. Requires chemical cleaning followed by a mechanical polish.
- Severe with pitting: Pockmarked surface, dark spots, uneven texture. Seek a professional assessment alongside chemical stabilisation.
Alongside severity, identify your surface type before choosing any product: bare (uncoated) aluminium, anodised aluminium, and powder-coated aluminium each have different chemical tolerances, and using an abrasive polish on anodised aluminium, for example, causes irreversible damage to its protective layer.
With your severity level and surface type confirmed, gather everything listed below before you touch the surface — having it all within reach means the procedure runs without interruption.
What to Gather Before You Start
- pH-appropriate aluminium cleaner: A cleaner explicitly labelled aluminium-safe is the safest default. Confirm it sits within the pH 5–8 safe window.
- Household acid option (diluted): Cream of tartar or lemon juice work well. White vinegar is usable only when properly diluted — never apply it undiluted.
- Soft-bristle brush or non-scratch pad: For agitating the cleaner without scratching. A soft wash mitt also works for flat, open areas.
- Microfibre cloths: For wiping, buffing, and drying. Have at least two — one for application, one for drying.
- Clean water for rinsing: Fresh water, readily accessible. Essential for flushing cleaner residue from the surface after treatment.
- Protective gloves and eye protection: Required when handling any acidic or chemical cleaner. Put these on before opening any cleaning product.
- Aluminium-specific polish: For heavy crust cases only. Needed after chemical cleaning to restore the surface mechanically.
- Protectant or sealant: Applied after cleaning to slow re-oxidation. Have it ready so you can apply it while the surface is clean and dry.
Equally important is knowing what not to reach for — several common household items will permanently damage aluminium on contact.
- Steel wool: Scratches the surface and embeds iron particles that then rust, leaving orange spots that are extremely difficult to remove.
- Fibreglass hull cleaner: Formulated at pH 1–3, these etch, pit, and discolour bare aluminium on contact. Never substitute for an aluminium-rated product.
- Bleach or ammonia cleaners: Bleach causes pitting and black staining on aluminium. Ammonia-based products corrode the surface. Both cause permanent damage.
- Abrasive scouring pads: Scratch through aluminium's surface, exposing fresh metal that oxidises faster. Use non-scratch pads only.
- Undiluted white vinegar: At pH 2.5–3, undiluted vinegar sits well below the safe window and will etch the surface. Always dilute before use.
Before applying any cleaner you already own, check its pH — the difference between a safe result and a damaged surface often comes down to this single number.
Aluminium is safe to clean within approximately pH 5–8. Below pH 5, acid chemistry etches the surface. Above pH 8, alkaline chemistry dissolves the oxide layer and accelerates corrosion. Dish soap (typically pH 8.5–9.5) and undiluted white vinegar (pH 2.5–3) both fall outside this window — check any cleaner's pH before use.
With severity assessed, surface type identified, and materials gathered, the procedure begins with Step 1: a pre-clean to remove loose dirt, grease, and surface grime before any oxidation treatment is applied.
Step 1
Pre-clean the surface to remove loose debris and grime
Key Insights
Use aluminium-safe, pH-balanced soap with a soft mitt.
Use a detail brush on recessed areas.
Don't proceed if the surface is still contaminated.
Before any chemistry touches the surface, it needs to be free of loose dirt, grit, and salt deposits — contaminants that reduce the effectiveness of cleaning treatments and can trap abrasive particles against the metal.
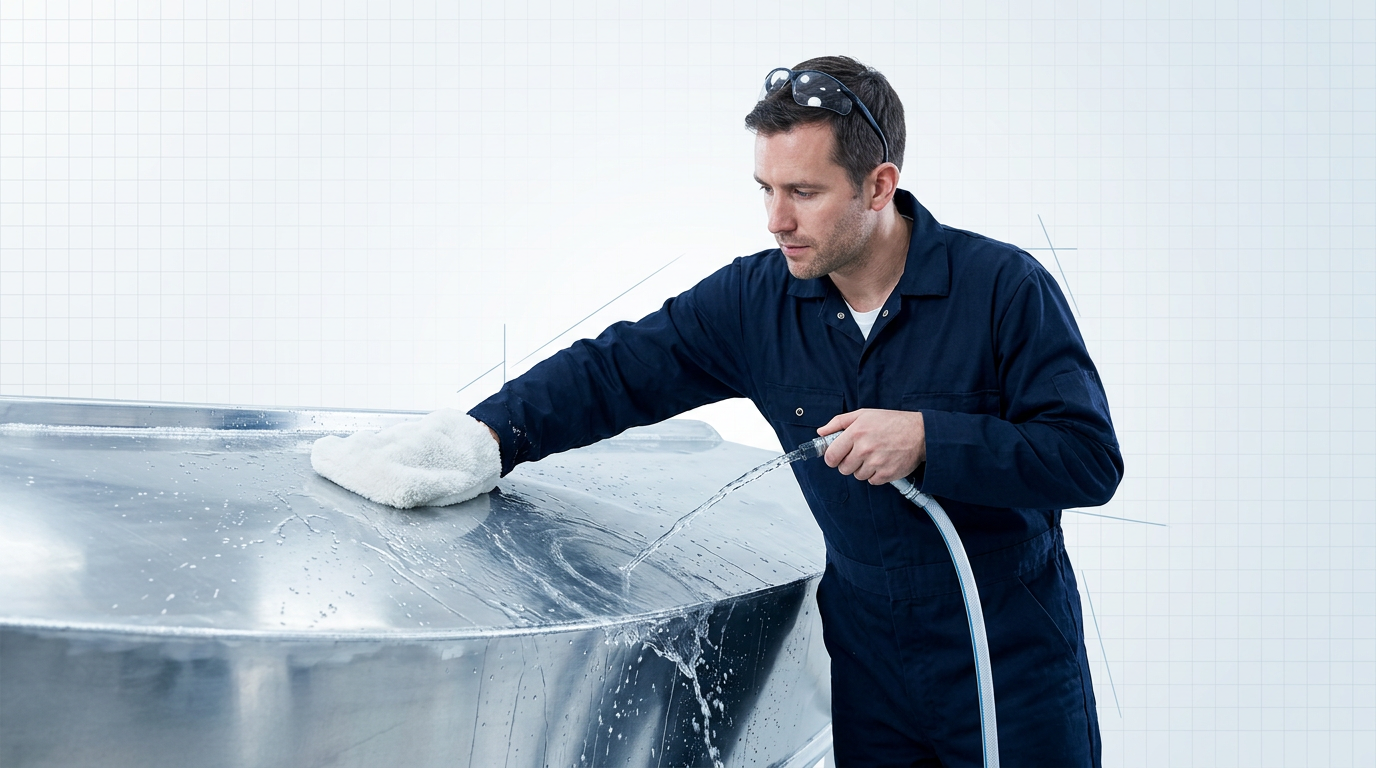
Start with a thorough rinse using plain water to dislodge loose dust and surface debris. For marine aluminium, this initial rinse is especially important: chloride ions from salt residue sit under visible grime and accelerate corrosion if left in place.
- Rinse with plain water: Hose down the entire surface to shift loose dust, salt, and debris before any soap is introduced.
- Wash with an aluminium-safe soap: Apply a pH-balanced soap confirmed as aluminium-compatible on its label — not all automotive or marine soaps qualify. Use a soft wash mitt or microfibre cloth; never an abrasive pad.
- Work recessed areas with a detail brush: Use a soft-bristle detail brush on joins, hardware edges, and recessed fasteners, where grime accumulates disproportionately and a mitt cannot reach.
- Final rinse: Rinse the full surface thoroughly to remove all soap residue, working top to bottom so runoff does not re-contaminate cleaned areas.
- Inspect visually: Check that the surface is free of visible dirt, grease, and loose oxidation. It should look uniformly wet with no dull patches of remaining grime.
If any area still shows visible contamination after the final rinse, run a second wash pass rather than pressing on — correcting a failed chemical treatment downstream takes far longer.
A contaminated surface undermines every subsequent step. A second wash pass now is quicker than troubleshooting a chemical treatment that could not penetrate through grime.
Step 2
Apply a chemical or household acid cleaner
Key Insights
Apply acid cleaner, dwell 1–3 mins, then rinse.
Never layer applications — always rinse first.
Anodised aluminium: test first, dilute more.
With the surface pre-cleaned and free of loose debris, chemical treatment is the first active step in removing oxidation from aluminum — and the right one to reach for before any abrasive method.
Using a commercial aluminium cleaner
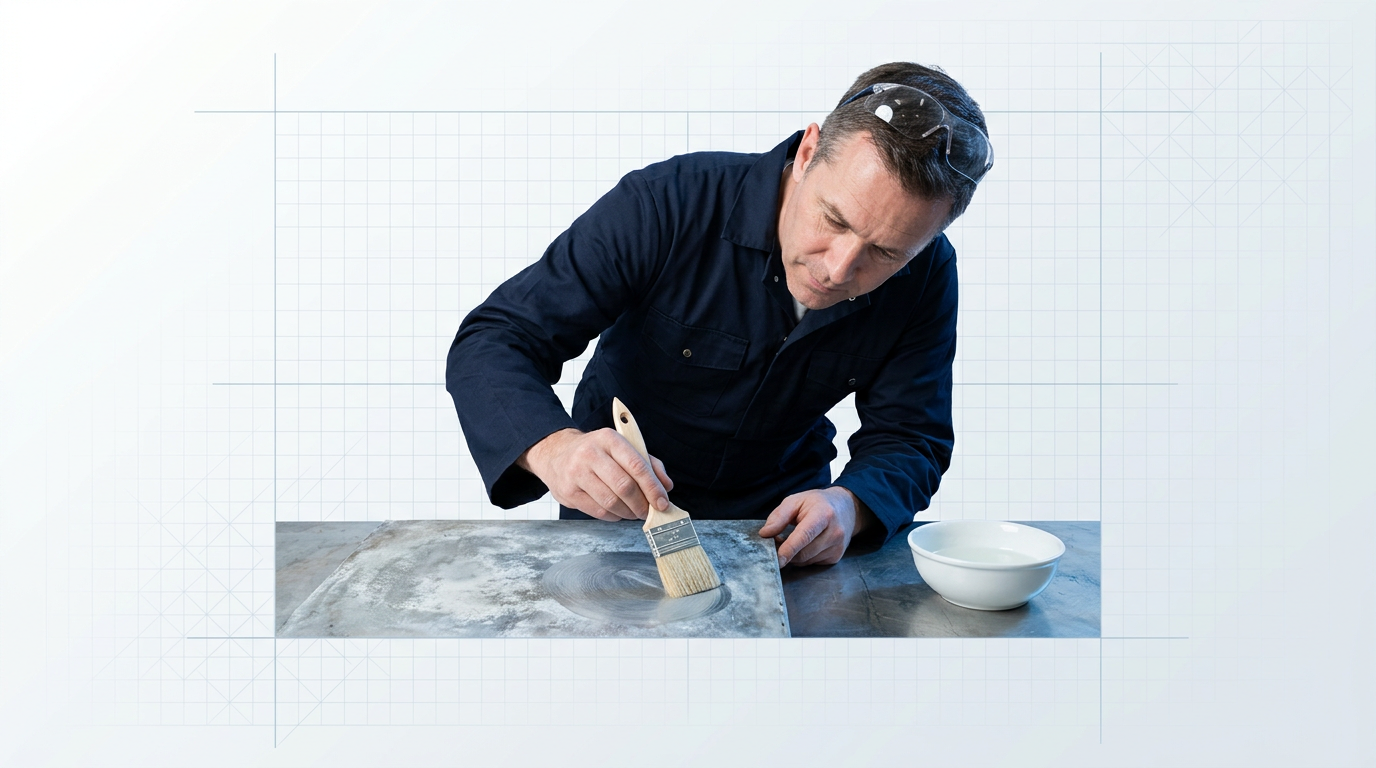
Apply the cleaner directly to the oxidised surface, working in manageable sections rather than coating the entire piece at once.
Allow it to dwell for the time specified on the product — typically 1 to 3 minutes depending on oxidation severity. The acid chemistry dissolves the oxide layer without attacking the base metal, but only within the correct contact window.
Agitate with a soft-bristle brush or a non-scratch pad using light, circular strokes, then rinse the section thoroughly with clean water before moving on.
DIY household acid options
For light to moderate oxidation, common kitchen acids work effectively and are a practical alternative to commercial products.
- White vinegar: Dilute with water before applying to the surface — a small amount per litre is sufficient for a working solution. Apply with a cloth or soft brush, allow a short dwell, then rinse.
- Cream of tartar: Mix with a little water to form a paste and apply directly to the oxidised area. It also works as a solution for the boiling method on cookware and small parts.
- Lemon juice: Use undiluted on its own, or combine with a pinch of salt for stubborn spots — the salt adds a mild mechanical action alongside the citric acid.
None of these household options are inferior to commercial cleaners for light cases; they simply differ in concentration and convenience.
Boiling method for cookware and small parts
For submersible items such as pots, pans, or small aluminium fittings, the boiling method accelerates oxide dissolution using heat as a catalyst.
- Fill the vessel: Add water and your chosen acid solution — cream of tartar or diluted white vinegar both work well.
- Bring to a simmer: Heat gently for 10 to 15 minutes. Avoid a rolling boil; a steady simmer is sufficient.
- Watch for cloudiness: The water will visibly cloud as oxidation lifts from the surface — this is the expected result.
- Cool before handling: Remove from heat and allow the item to cool fully before touching or rinsing.
This method is particularly useful for aluminium cookware that has darkened after dishwasher exposure or prolonged storage.
Never exceed the recommended contact time for any acid cleaner, commercial or household. If you apply a second pass before fully rinsing and drying the surface first, you are concentrating acid chemistry on the same spot — significantly increasing the risk of etching the aluminium. Always rinse completely, dry, and then re-apply if a second pass is needed.
After agitation and rinsing, check the surface: oxidation that has responded to treatment will appear visibly lighter or brighter. If the surface still looks dull, a second pass is appropriate — but only after it has been fully rinsed and dried first.
If two chemical passes produce no visible improvement, the oxidation is likely too heavy for acid treatment alone, and the next step covers the mechanical methods needed to address it.
Caution for anodised aluminium
On anodised aluminium, test any acid solution on a small, inconspicuous area before treating the full surface. Use a more dilute solution and a shorter dwell time than you would on bare aluminium — prolonged acid exposure can damage the anodised layer even though it is more chemically resistant. Full surface-specific guidance is covered in Step 4.
Step 3
Use mechanical methods for heavy oxidation
Key Insights
Escalate to abrasives only after chemical methods fail.
Never skip grits — each removes prior scratches.
Use stainless steel wire brushes only.
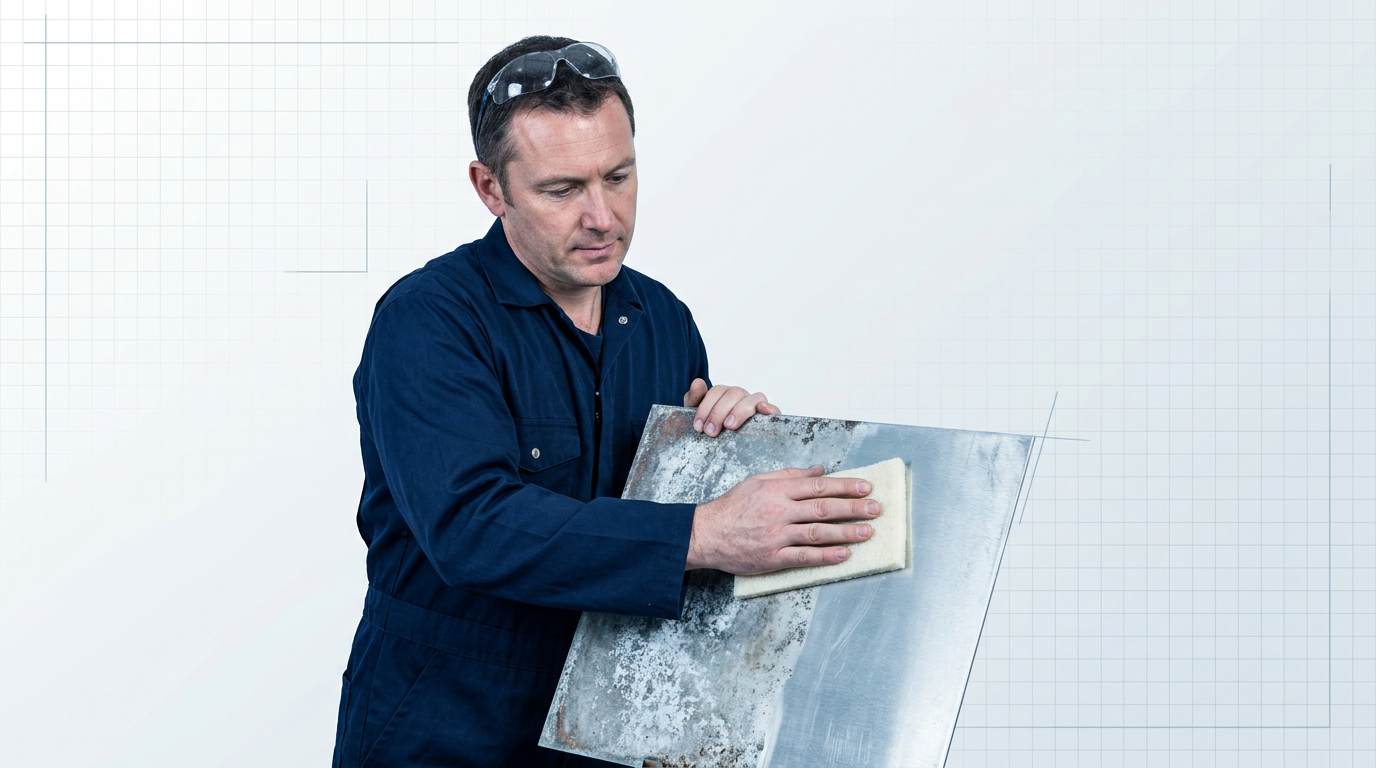
If two correctly-applied chemical passes have not fully shifted the oxidation, or you need to prepare the surface before a protective coating, it is time to escalate to mechanical methods. Reach for abrasives only at this threshold — not as a first-line option.
Start with a non-woven abrasive pad
For most cases that require mechanical intervention, a non-woven abrasive pad is the right first tool. Unlike sandpaper, it abrades without cutting deep grooves into the surface, is less likely to alter the surface profile significantly, and gives a non-specialist far more control over the result.
Work the pad in straight strokes along the grain of the aluminium where it is visible. Use light, consistent pressure and let the abrasive do the work — bearing down hard generates heat that can damage the surface and produces uneven results.
Sanding progression for severe oxidation
When the oxidation is severe or you are preparing for polishing, move to wet-or-dry sandpaper and follow a deliberate grit progression. Start only as coarse as the surface condition actually demands.
- 150–250 grit: Use only on rough, heavily oxidised surfaces where the abrasive pad has made no meaningful progress. This is the starting point for severe cases.
- 400 grit: Transition grit that begins removing the scratch pattern left by the coarser stage. Do not skip from 250 directly to fine grits.
- 600–800 grit: Refines the surface further. At this stage the aluminium should be visibly smoother and the oxidation largely gone.
- 1000–1500 grit: Final sanding stage before polishing compound. The surface should feel smooth to the touch with a consistent, fine scratch pattern.
Do not dwell on one spot — keep the pad or paper moving continuously to avoid heat build-up from friction.
Each grit stage removes the scratch pattern left by the one before it. Skipping a grit leaves scratch marks that the next finer grit cannot correct — you will have to go back and repeat the missed stage.
If you are using a wire brush for weld preparation or heavy oxide removal, use stainless steel wire only. Carbon steel brushes embed iron particles into the aluminium that subsequently rust, creating a new contamination problem. Solid brass wire is also acceptable; brass-coated steel is not.
Finish with an aluminium polishing compound
Once abrasive work is complete, apply an aluminium-specific polishing compound to restore reflectivity through controlled micro-abrasion. Work in small sections using a soft cloth or buffing pad, and buff each section before the compound dries.
- Work with the grain: Follow the direction of the aluminium's surface grain throughout — this produces a cleaner, more consistent finish.
- Light, even pressure: Let the compound do the cutting. Heavy pressure causes uneven polishing and can introduce new scratches.
- Small sections at a time: Polishing compound dries quickly on aluminium. Work one area fully before moving to the next.
- Keep the pad moving: Never hold the buffing pad stationary — friction heat builds rapidly and can discolour or warp thin aluminium.
The verification cue for abrasive pad work is a uniform scratch pattern across the treated area — consistent, not patchy or streaky. For polishing compound, look for even, increasing reflectivity across the section. Uneven results signal inconsistent pressure, a skipped grit, or a spot that needs another pass.
When Abrasives Aren't Enough, Laser Cleaning Is
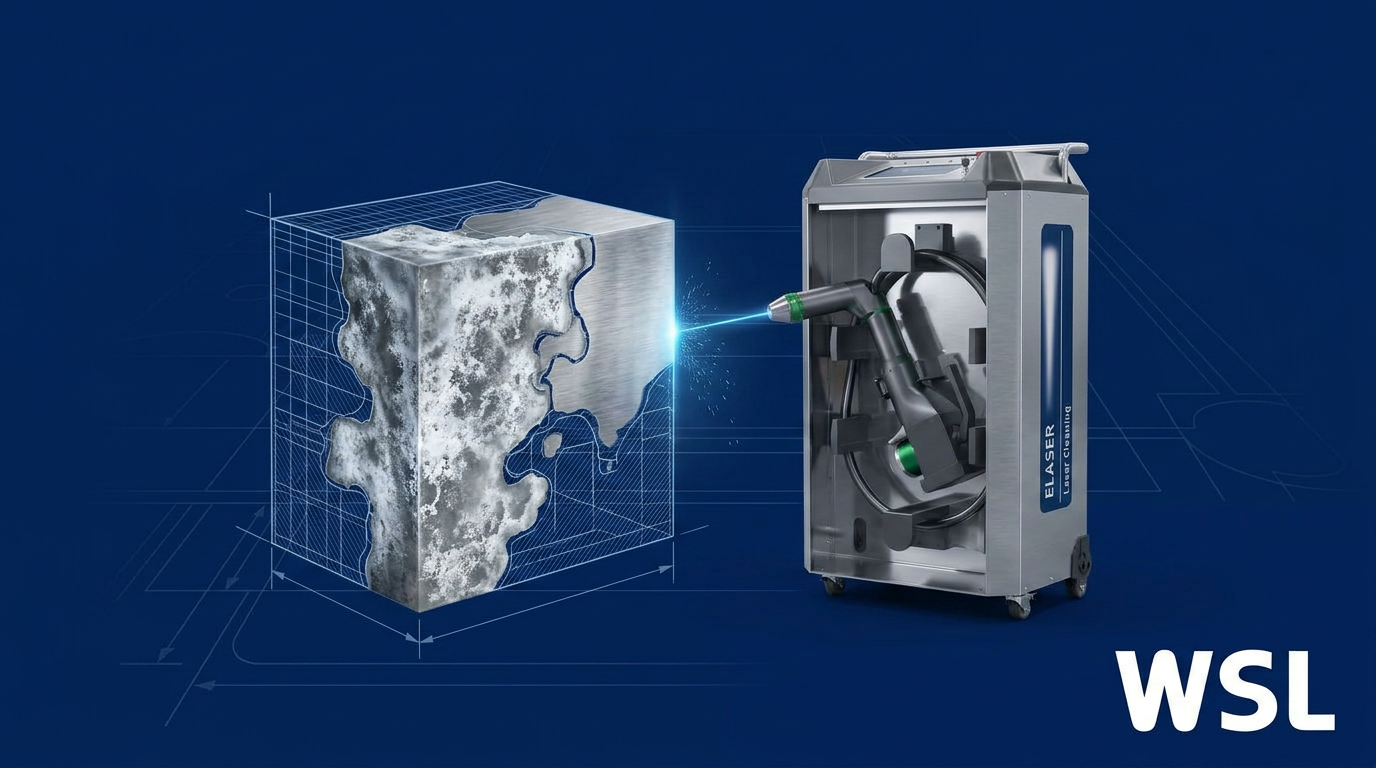
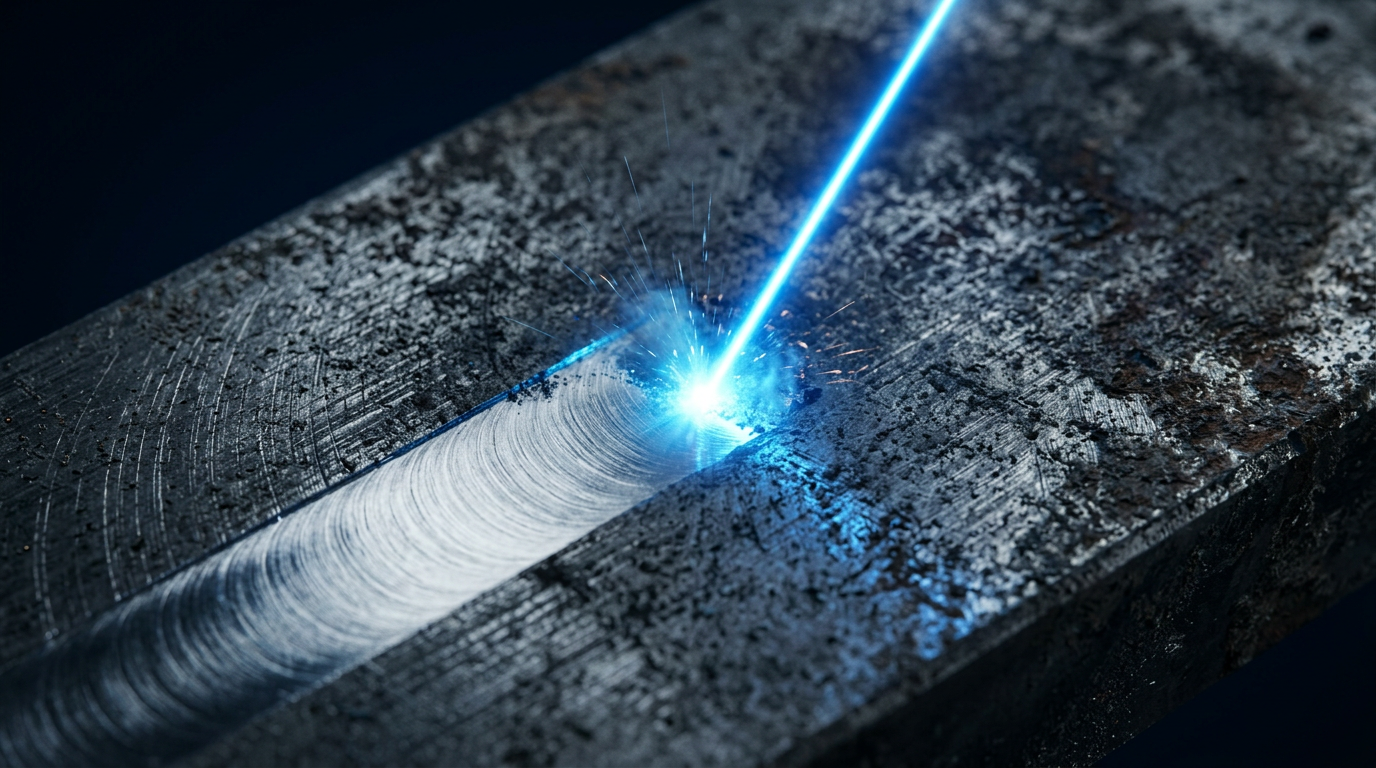
For heavy or recurring oxidation on aluminium, laser cleaning removes surface contamination with precision — no abrasive contact, no risk of scratching. See how Woodrow Scientific's machines handle the job.
Step 4
Adapt your approach for your specific aluminium surface
Key Insights
Anodised aluminium: no abrasives, short dwell times.
Remove brake dust before treating wheel oxidation.
Flush cleaner away from engine seals immediately.
Rinse marine aluminium with fresh water after outings.
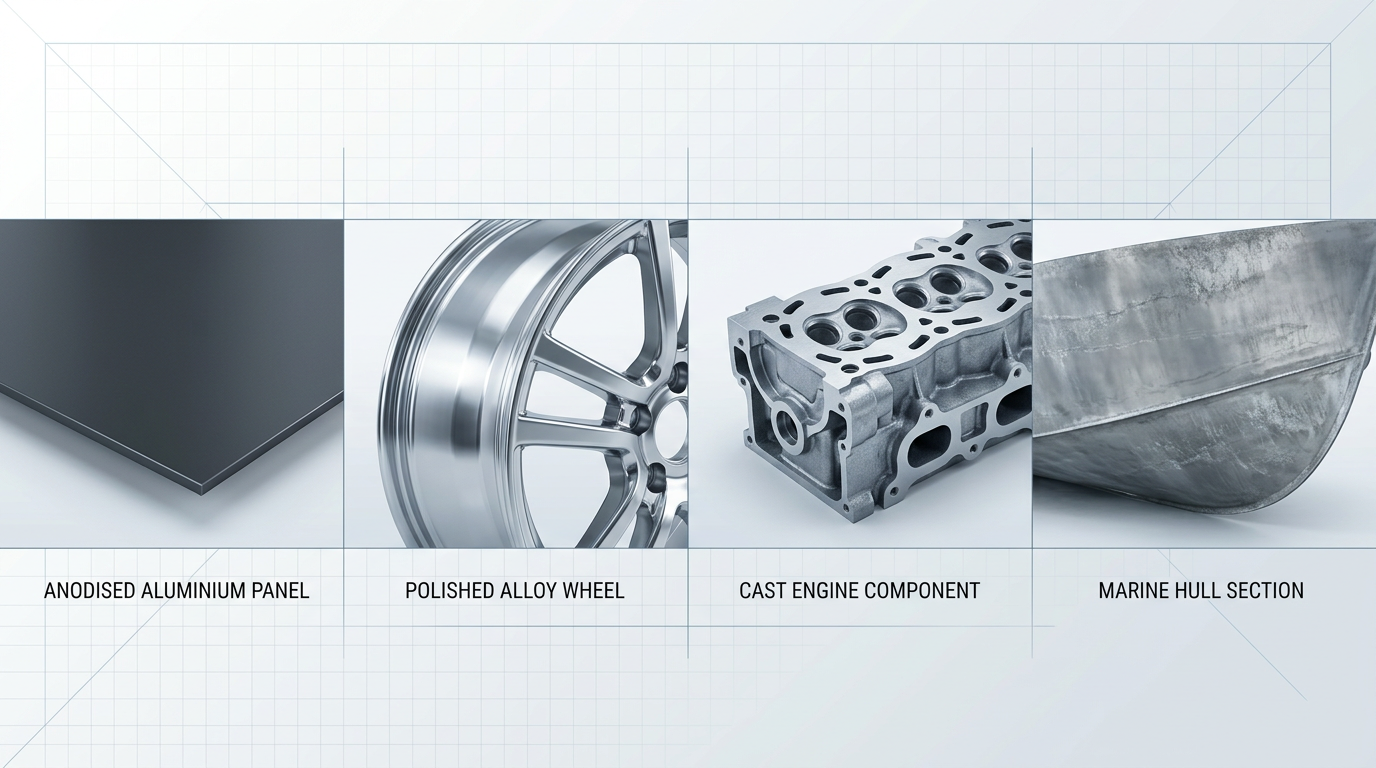
The chemical and mechanical methods from Steps 2 and 3 work across aluminium surfaces — but each surface type has specific constraints that change how you apply them. Work through the sub-topic that matches your surface before moving to Step 5.
Anodised aluminium
The anodic layer is more chemically resistant than bare aluminium, but it is not impervious — abrasive polishes will physically strip it, and aggressive acid cleaners can penetrate it with prolonged contact.
When applying the chemical cleaner from Step 2, use a pH-neutral or only mildly acidic formulation, keep the dwell time shorter than you would on bare metal, and test on an inconspicuous area first.
Avoid any product explicitly labelled "do not use on anodised aluminium" — and skip abrasive pads entirely on this surface type.
This caution is not optional: once the anodic layer is stripped, the bare metal beneath re-oxidises significantly faster and the surface cannot be restored without professional re-anodising.
Wheels and rims
Before applying any chemical cleaner to wheels, mask or remove the tyres — acid-based cleaners will degrade rubber on contact.
- Brake dust first: Remove brake dust as a separate pre-clean step before treating oxidation. Brake dust is corrosive and will interfere with oxidation treatment if left on the surface.
- Polished bare aluminium wheels: Polish before applying protection. Once polished, finish with a clear coat or polymer sealant rated for aluminium to hold the result.
- Anodised wheels: Follow the same caution as anodised aluminium above — pH-neutral cleaner, short dwell time, no abrasive pads.
Confirm the wheel is ready for Step 5 by checking that no cleaner residue remains in the spoke recesses and the surface feels uniformly clean.
Engine components and cast aluminium
The primary risk on engine components is chemical contact with rubber seals, gaskets, and bearings — cleaner runoff reaching these areas causes deterioration that is far more costly than the oxidation itself.
Flush any cleaner runoff away from seals immediately, do not exceed minimum dwell times on engine surfaces, and rinse thoroughly and promptly once treatment is complete.
For high-value or precision engine parts where chemical residue near seals is a genuine concern, a chemical-free method is worth considering. Portable laser cleaning systems remove oxides from aluminium alloys with minimal substrate loss and no chemical residue — the beam stops at the base material, leaving no runoff and no risk of cleaner contact with seals or gaskets.
The ELASER by Woodrow Scientific Limited is one such system. WSL is the only UK-based laser cleaning manufacturer — it designs, builds, and supports its own machines in-house rather than reselling imported units, which matters for reliability and support in a workshop context. The handheld scanner weighs under 3 kg with up to 50 m of reach, making it practical for single-operator use on-site. It carries CE and UKCA certification.
Marine aluminium
Salt contamination is the defining challenge on marine aluminium: chloride ions layer beneath oxidation and accelerate galvanic corrosion, particularly where aluminium contacts stainless steel fittings.
A thorough fresh water rinse after every salt water outing is the single most effective maintenance action for marine aluminium. It removes chloride deposits before they can work under the surface and drive corrosion.
When applying the chemical cleaner from Step 2 to marine surfaces, work from the least-contaminated areas toward the most corroded, and pay particular attention to joints and fittings where dissimilar metals meet.
Protectant application — covered in Step 6 — is not optional in marine environments. The corrosion rate on unprotected marine aluminium is meaningfully faster than on inland surfaces, and skipping the protection step undoes the cleaning work quickly.
Recessed areas and complex geometry
Use a soft-bristle detail brush, cotton swabs, or a folded cloth to work cleaner into channels, bolt recesses, and joins — but do not allow cleaner to pool in crevices.
After rinsing, use compressed air or a dry cloth to clear residue from enclosed areas. The surface is ready for Step 5 when no visible residue remains in any recess and the geometry feels uniformly clean and dry.
Step 5
Rinse, neutralise, and dry the surface correctly
Key Insights
Neutralise acid residue with a baking soda rinse.
Dry with a microfibre cloth — never air-dry.
Work in sections — don't let cleaner dry.
The cleaning work is done, but this step is where its quality is either preserved or squandered. A rushed rinse and an air-dry can leave the surface worse than a careful finish would — acid residue keeps etching, mineral deposits from evaporating water dull the metal, and trapped moisture accelerates re-oxidation before any protectant reaches the surface.
Rinse immediately and flush every surface
As soon as your chemical treatment is complete, rinse with clean water straight away — not after tidying up, not once you've moved to the next panel.
Thorough rinsing means more than running water over the flat face of the surface. Flush edges, joins, rolled lips, recessed bolt holes, and any crevice where cleaner tends to collect and sit. These are the spots where acid chemistry lingers longest and causes the most localised damage if left.
If you are working on a large surface, do not treat the whole area and then rinse. Work in sections — treat, rinse, move on — so no area sits with cleaner drying onto it while you finish elsewhere. Dried cleaner residue is significantly harder to remove than wet residue, and it can leave staining or uneven etching behind.
Neutralise acid residue with a baking soda rinse
After any acidic cleaning — whether a commercial aluminium cleaner or a household acid like vinegar or cream of tartar — follow your water rinse with a mild alkaline solution to neutralise remaining acid chemistry before the final flush.
The accessible DIY approach is baking soda dissolved in water: mix approximately one tablespoon per litre, apply it across the rinsed surface, and then rinse again with clean water. This step is most critical when you used a stronger commercial cleaner, allowed a longer dwell time, or are working on a surface with many crevices where acid can pool. For light household acid applications with short dwell times, the risk is lower — but the step is still good practice and costs almost nothing to do.
Dry with a cloth — never air-dry
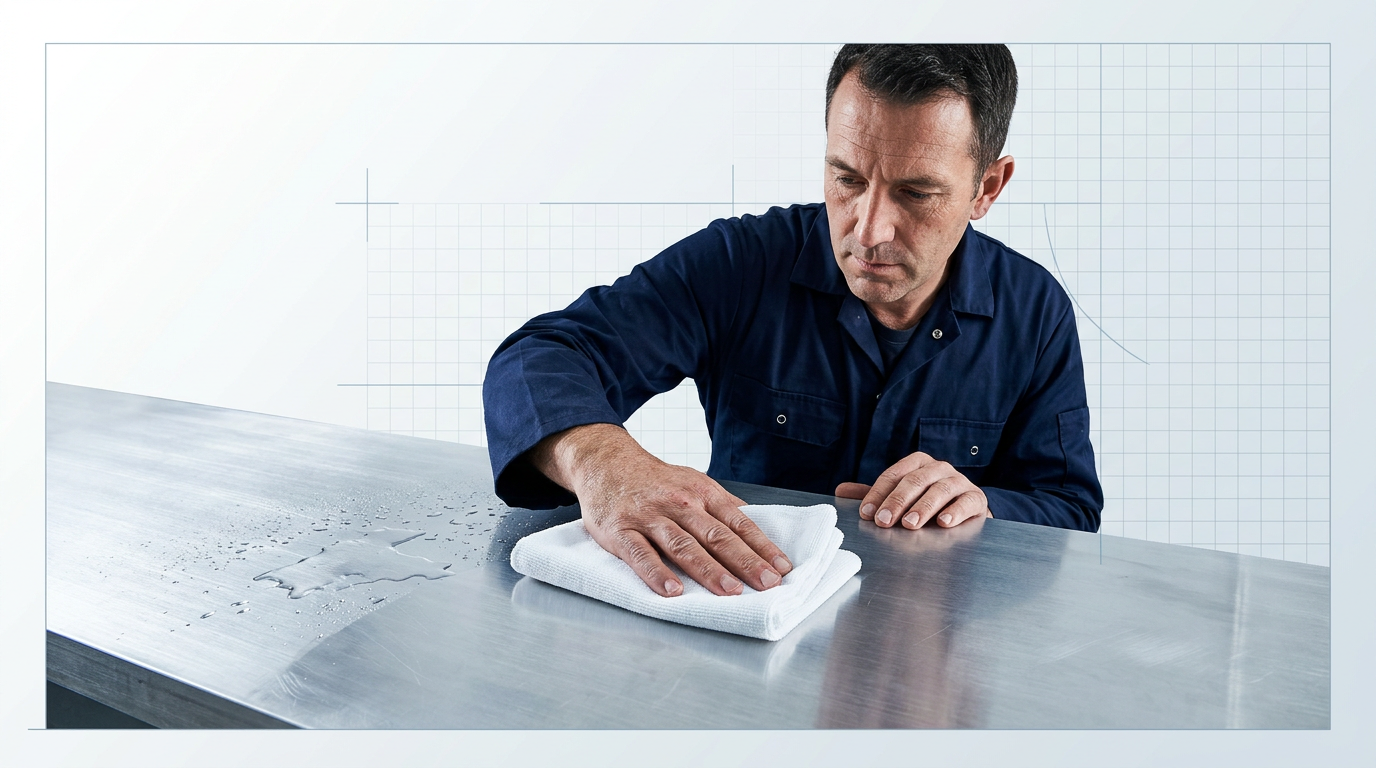
Once the final rinse is complete, dry the surface immediately with a clean, soft microfibre cloth. Do not leave it to air-dry.
As water evaporates naturally, the minerals it carries are deposited directly onto the metal surface. These water spots dull the finish and require additional cleaning to remove before a protectant can bond effectively — undoing work you have already done.
Work systematically across the surface with your cloth, section by section, so no patches of standing water are left behind. Fold the cloth regularly to present a dry face to the metal as you go.
Pay close attention to recesses and complex geometry
Recesses, handles, rolled edges, joins, and enclosed areas need deliberate attention at this stage — these are exactly the spots where standing water hides and accelerates corrosion, particularly on marine aluminium and outdoor surfaces.
- Cloth-accessible recesses: Use the corner or edge of a dry microfibre cloth to wick moisture from grooves, joins, and rolled edges. Press the cloth into the recess and draw it out rather than wiping across.
- Enclosed spaces: Where a cloth cannot reach effectively — deep bolt holes, enclosed channel sections — use compressed air to blow out standing water before it has a chance to sit.
- Marine and outdoor surfaces: Give extra time to any area that faces prolonged exposure to moisture. A surface that looks dry on its face can still hold water in joins for long enough to begin re-oxidising before a protectant is applied.
Once you are satisfied the surface is fully dry, take a moment to check your work before moving on.
Look across the surface in good light. It should appear uniformly clean and bright, with no streaking, hazy patches, or visible residue. If you can see streaks or haziness at this point, re-clean that area before drying and proceeding. Do not apply any protectant over a surface that has not passed this check — it will not bond correctly, and the result will be uneven.
Step 6
Apply a Protectant to Seal the Surface
Key Insights
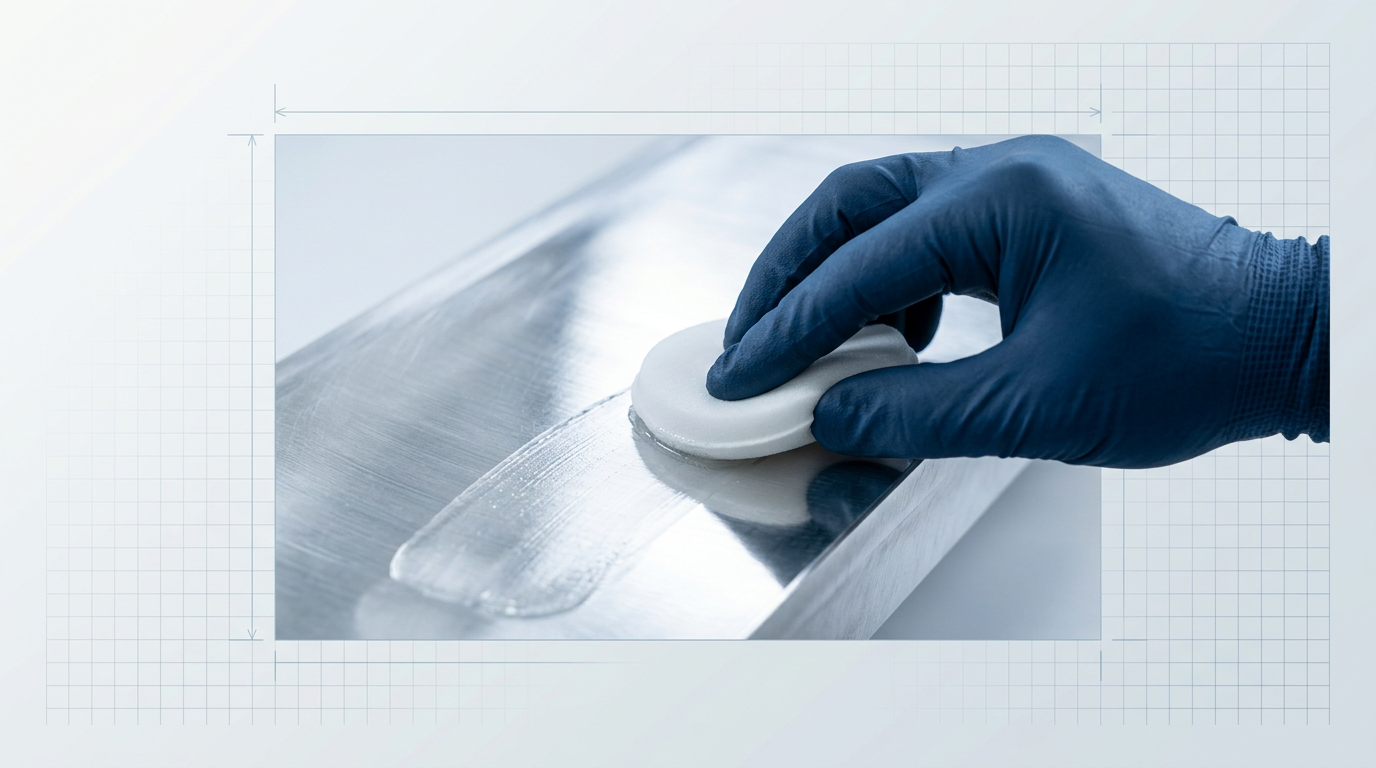
Apply protectant immediately after drying the surface.
Match protectant to surface: wax, sealant, clear coat.
Marine aluminium needs protectant after every clean.
Never coat over remaining oxidation or dirt.
With the surface clean and dry from Step 5, act immediately: bare aluminium begins re-oxidising as soon as it is exposed to air, and this is the window where a protectant does its most effective work.
Applying a barrier now significantly slows the return of oxidation, extending the interval before the next cleaning cycle and reducing cumulative wear on the substrate over time.
Choose your protectant based on the surface type and the level of durability you need.
- Wax (paste or liquid): The most accessible option for outdoor furniture, general rims, and everyday aluminium surfaces. Apply a car wax with UV protection in thin, even strokes using a soft applicator pad, allow it to haze, then buff off. Wax provides a temporary moisture barrier and needs reapplication every few months.
- Polymer sealant: A longer-lasting mid-tier option suited to polished wheels, marine hardware, and automotive trim. Check the label for aluminium compatibility before applying — not all sealants are formulated for non-ferrous metals. Apply after polishing for the best bond.
- Clear coat spray: The most durable DIY option for polished bare aluminium wheels and high-shine surfaces. Apply in thin, even, overlapping coats, allowing adequate flash time between each pass. Allow the coating to fully cure before exposing the surface to water or chemicals.
- Specialist clear coatings (Everbrite, ProtectaClear): Designed specifically for anodised and architectural aluminium. These coatings restore colour and lock out further oxidation. Critical rule: apply only to a surface that is completely clean and dry — never coat over residual oxidation or dirt, as the coating will seal the contamination in place.
For most surfaces, wax or a polymer sealant is sufficient; clear coat and specialist coatings are worth the extra effort when you need lasting protection on a high-value or high-exposure surface.
Salt water chloride ions accelerate re-oxidation rapidly on unprotected aluminium. Apply a protectant after every cleaning session on marine hardware, and re-inspect the surface any time it begins to haze — do not wait for the next scheduled clean.
Whichever protectant you choose, the application rule is the same: work on a clean, dry surface, apply in thin even layers, and allow proper cure time before the surface sees water or heavy use.
Skip the Manual Labour Next Time Around
Laser cleaning removes oxidation from aluminium with no abrasive contact and no risk of surface damage. See how Woodrow Scientific's ELASER handles the job.

Conclusion
What success looks like — and how to keep it
If the surface is uniformly bright, free of chalky residue and streaking, with the protectant sitting evenly across the metal, you have done this right.
The principle that carried every decision in this process is worth keeping: match the method to the severity, and use only as much aggression as the surface actually needs.
From here, maintenance is far easier than what you just did — wash regularly, reapply protectant before hazing returns, and if you find pitting or structural damage that cleaning cannot resolve, a professional assessment is the honest next step.
Frequently asked questions about removing oxidation from aluminium
Common questions about methods, mistakes, and materials for cleaning and restoring oxidised aluminium surfaces.
Yes — standard fibreglass hull cleaners will damage bare aluminium. Most sit at pH 1–3, which is aggressive enough to etch and pit the metal on contact. Aluminium has a safe cleaning window of approximately pH 5–8, and fibreglass products are formulated for a chemically inert surface, not for metal. The label saying "marine cleaner" or "boat cleaner" is not sufficient reassurance. Only use a product that explicitly states it is safe for aluminium — check the label before it touches the surface.
Yes, and most abrasive polishes carry a label warning specifically against use on anodised aluminium for this reason. The anodic layer is the protection — it is a hard oxide coating that is integral to the surface, not a coating sitting on top of it. Once abraded away, it cannot be restored without professional re-anodising. The practical consequence is significant: stripped anodised aluminium is bare, unprotected metal that re-oxidises faster than it did before treatment. If the polish label does not explicitly confirm it is safe for anodised aluminium, do not use it on an anodised surface.
The most common cause is that the surface was not protected after cleaning. Bare aluminium begins re-oxidising as soon as it is exposed to air, so without a wax, polymer sealant, or clear coat applied immediately after drying, the process restarts almost straight away. A secondary cause is protectant degradation — in marine or outdoor environments, UV exposure and salt break down wax and sealant layers faster than in sheltered conditions. Re-clean the surface fully, then apply a fresh coat of the appropriate protectant for your surface type. In exposed environments, inspect the surface regularly and re-apply any time it begins to haze, rather than waiting for full oxidation to return.
Mild acid dissolves aluminium oxide — common options include white vinegar, cream of tartar, lemon juice, and commercial aluminium cleaners formulated with acid chemistry. The acid does the active work of breaking down the oxidation layer. After treatment, a mild alkaline rinse — baking soda dissolved in water — neutralises any residual acid before the final water rinse. This neutralising step is particularly important when using stronger commercial cleaners, as it stops ongoing acid action on the metal surface.
Yes, when used correctly. White vinegar works because its acetic acid dissolves aluminium oxide. The key conditions: dilute it (approximately 2 tablespoons per litre of water for surface application), keep contact time short, and rinse thoroughly afterwards. Prolonged contact with undiluted vinegar will cause pitting on bare aluminium — dilution and dwell time discipline are non-negotiable. Used carefully, it is a practical household option for light to moderate oxidation.
Restoring shine to oxidised aluminium takes three stages. First, chemical cleaning to dissolve and remove the oxidation layer — use an acid-based cleaner or a household acid solution such as vinegar or cream of tartar. Second, polishing with an aluminium-specific polishing compound to restore reflectivity through controlled micro-abrasion. Third, applying a protective sealant or clear coat to lock in the shine and slow re-oxidation. Skipping that final protection step means the shine is short-lived — bare aluminium begins dulling again quickly once exposed to air. The protectant is what makes the result last.
WD-40 produces a temporary visual improvement on aluminium but it is not a cleaner and it is not a protectant. It displaces surface moisture and leaves an oily film that gives a brief shine, but the effect typically lasts only a few days before the surface dulls again. Critically, it does not dissolve or remove aluminium oxide — it masks it temporarily. For a result that lasts, you need a proper aluminium cleaner (acid-based or a commercial aluminium-specific product) to remove the oxidation, followed by a wax, polymer sealant, or clear coat to protect the surface against re-oxidation.