

Introduction
If you are evaluating dry ice blasting cleaning before commissioning or adopting it, you already know the high-level pitch — and you need something more useful than that.
This walkthrough takes you through the process in sequence, from equipment setup to post-clean inspection, explaining what happens at each stage and why it matters.
Where most resources stop at the concept, this one follows the procedure — so by the end, you will have a working understanding of how each decision connects to the result.
TL;DR
Dry ice blasting cleaning is far more controllable than it first appears — but only when you understand the mechanics behind each stage. The difference between a clean result and a damaged substrate comes down to parameter decisions made before the trigger is ever pulled.
This article covers:

Equipment setup and dry ice loading
Pressure settings and nozzle selection
Blast technique — angle, standoff distance, and movement
The science of surface-level impact
How grease, paint, rust, and mould respond
Post-clean inspection and surface condition
What is dry ice blasting cleaning?
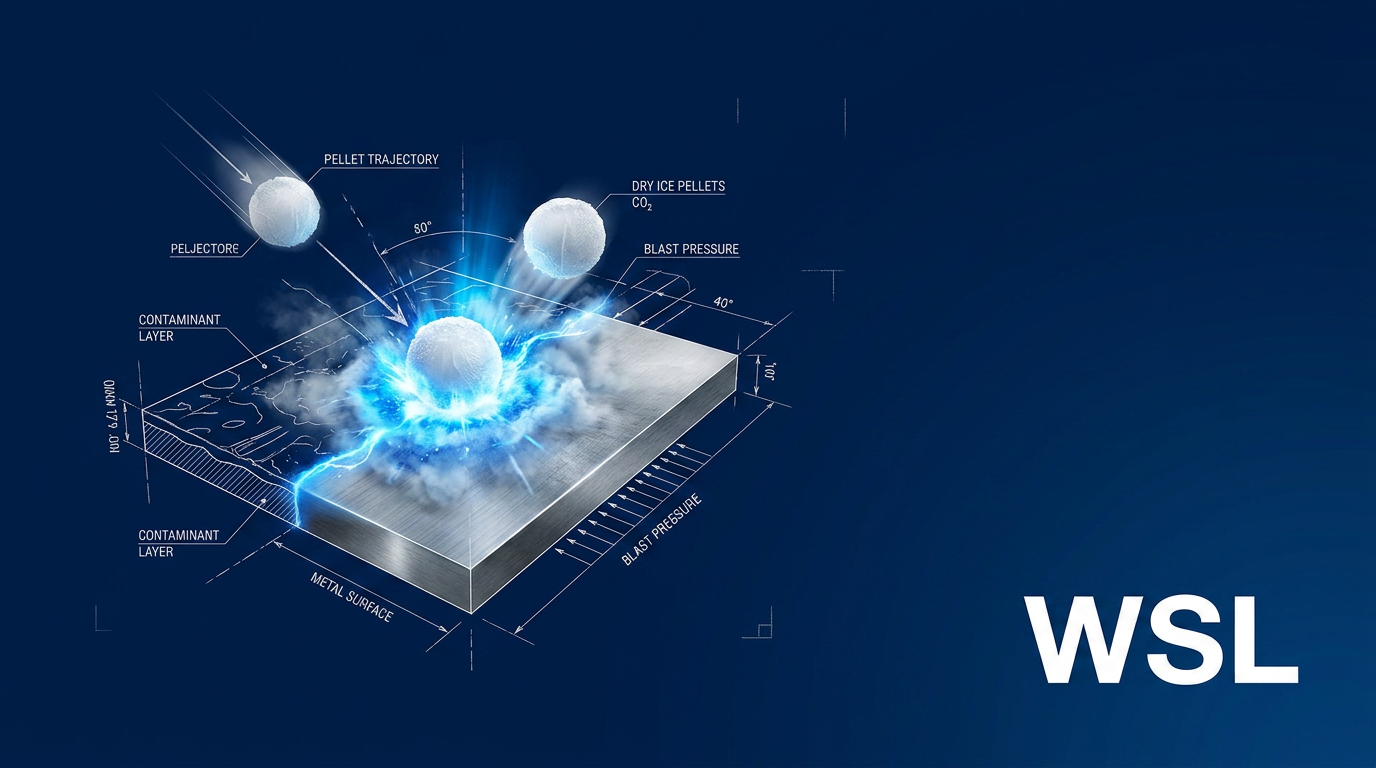
Dry ice blasting cleaning is the process of accelerating solid CO₂ pellets at high velocity through a nozzle using compressed air, directing them at a contaminated surface to dislodge and remove unwanted material.
Three simultaneous mechanisms drive the cleaning action — and Cold Jet, the leading dry ice blasting manufacturer, uses the acronym ICE to describe them: Impact (kinetic energy transferred on pellet contact), Cold (thermal shock at -78.5°C causing contaminant embrittlement), and Expansion (sublimation of the solid CO₂ to gas, expanding up to 800 times its original volume).
All three effects happen simultaneously, within milliseconds of contact. Keeping this ICE framework in mind is what makes the parameter decisions in the steps ahead — pressure, nozzle choice, standoff distance — logical rather than arbitrary.
The system that delivers this process has five core components you will work with from Step 1 onwards.
- Dry ice blasting unit: The machine that meters and propels dry ice pellets through the blast hose using a controlled feed rate.
- Compressed air supply: An external air compressor providing the pressurised air stream that accelerates pellets to high velocity.
- Insulated blast hose: Carries the pellet-and-air mixture from the blasting unit to the nozzle, insulated to manage the -78.5°C media.
- Nozzle: Directs and shapes the blast stream; nozzle geometry affects coverage width, velocity, and surface contact angle.
- Dry ice pellets: Solid CO₂ media, typically 3 mm in diameter, used as the blasting medium that sublimates on impact.
The practical result of this process is twofold: contaminants are removed without abrasive damage to the underlying substrate, and because the CO₂ sublimates to gas on impact, there is no secondary waste to collect or dispose of.
The reason the process is non-abrasive is measurable: dry ice sits at just 1.5–2 on the Mohs hardness scale, making it softer than virtually every industrial substrate it is used to clean. This single physical property is what underpins the parameter control logic you will encounter in the steps ahead.
Impact, Cold, and Expansion happen together in milliseconds — they cannot be separated in practice. Every parameter you set (pressure, feed rate, nozzle, standoff distance) shifts the balance between these three effects. Understanding the acronym before Step 1 is what turns those settings from guesswork into deliberate choices.
With the mechanics and the equipment components in view, the first step is connecting the compressed air supply, loading the hopper with dry ice pellets, and readying the system to blast.
Step 1
Set up equipment and load dry ice

Key Insights
Verify air supply pressure before loading dry ice.
Moisture in the air line causes icing and poor results.
Load pellets with cryogenic gloves — never bare hands.
Purge the system before firing the first blast.
Everything that happens during a dry ice blasting cleaning run depends on what happens before the first pellet leaves the nozzle. A verified air supply, clean lines, and a loaded hopper are the upstream controls that make every downstream parameter decision reliable.
- Connect the compressed air supply: Attach the compressed air line to the blasting unit's inlet fitting and confirm the supply meets the machine's minimum requirements. Most pellet blasting systems require a supply pressure of around 80 PSI at the machine inlet — check your unit's specification plate before proceeding. Volume requirements vary by machine model and nozzle class, so consult the equipment manual for the CFM rating your setup demands. Do not load dry ice until the air supply is confirmed adequate; an undersized supply makes every subsequent parameter setting unreliable.
- Check air quality — clean, dry, and filtered: Install an inline moisture separator and filtration stage on the air supply line before it reaches the blasting unit. Moisture in a compressed air line is a direct operational problem for cryogenic blasting: it freezes inside the hose and nozzle, disrupts blast pattern consistency, and causes pellets to break apart before they reach the surface. Verify the separator and filter are in place and functioning before continuing.
- Load dry ice pellets into the hopper: Put on cryogenic gloves before handling dry ice — the pellets are at -78.5°C and will cause cold burns on bare skin. Pour the pre-sized pellets (typically 3 mm diameter) into the unit's insulated hopper. The consistent 3 mm diameter is not arbitrary: the machine's feed mechanism is calibrated for that size, and using off-spec pellets disrupts the feed rate and blast consistency.
- Purge the system before the first blast: With the hopper loaded and the air supply open, run compressed air through the hose and nozzle for several seconds before firing the first blast. This clears any residual moisture or ice build-up from the interior of the hose and nozzle. It takes only seconds and prevents the uneven first burst that internal icing can cause.
Air quality deserves particular attention because it is the one input that operators most commonly overlook. Compressed air from a standard industrial compressor carries moisture — and in a cryogenic process, that moisture does not simply pass through harmlessly.
When moist air contacts the cold interior surfaces of the blast hose and nozzle, it freezes. The result is a partially blocked or irregularly shaped flow path that produces an unstable blast pattern and breaks pellets before they ever reach the contaminant surface. A moisture separator fitted upstream of the blasting unit is the standard fix: it strips liquid water from the air stream before it enters the system.
The supply pressure check is a separate concern from the blast pressure you will dial in during Step 2. Here, the only question is whether the compressor and line can deliver adequate pressure and volume to the machine inlet under load — not what pressure the blast nozzle will operate at. A pressure drop greater than 10 PSI when the trigger is pulled indicates the supply is undersized for the application.
When loading pellets, the insulated hopper slows sublimation, but dry ice still sublimates continuously at ambient temperature. Load only what you expect to use within the session to minimise waste and avoid CO₂ build-up in the working area.
Before moving to Step 2, confirm all three of the following: (1) air supply pressure is adequate and holds steady with no drop greater than 10 PSI under trigger pull; (2) the hopper is loaded with correctly sized pellets; (3) the system has been purged. All three confirmed means the unit is ready to configure.
Step 2
Select your nozzle and set blast pressure
Key Insights
Start low — raise pressure only if needed.
Round, flat, or angled — match nozzle to application.
With the unit loaded and purged, these next decisions are the ones that protect the substrate: the nozzle you fit, the pressure you set, and the distance you hold all determine whether the dry ice blasting cleaning process removes contamination cleanly or damages the surface beneath it.
Choosing the right nozzle for the job
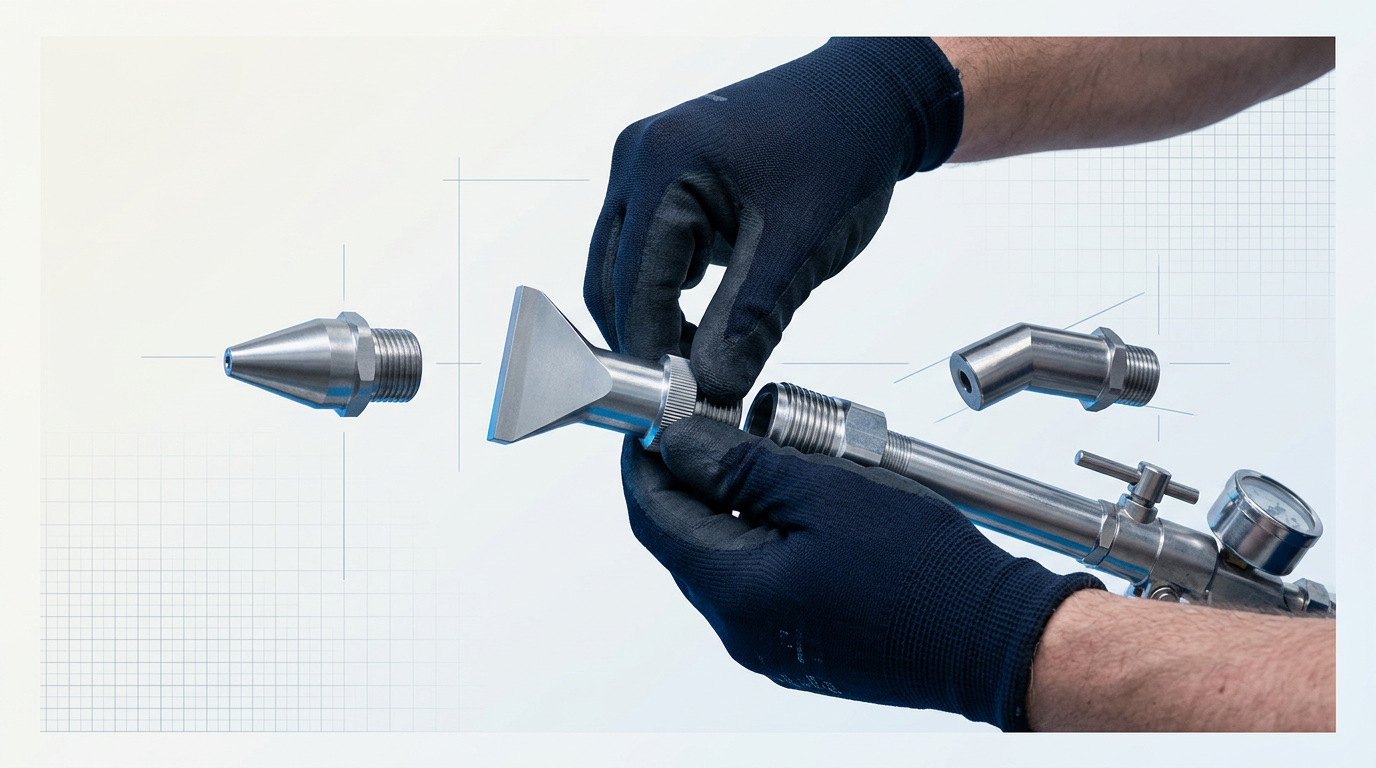
Nozzle shape controls how kinetic energy is distributed across the target surface — a tight footprint for precision work, a wide footprint for coverage, or an offset angle for geometry that a straight nozzle cannot reach.
- Round / conical nozzle: Concentrates energy into a focused point. Use this for stubborn, localised deposits where you need to direct impact precisely without disturbing the surrounding area.
- Flat nozzle: Distributes energy across a wider footprint. The right choice for large, even surfaces where consistent broad coverage matters more than concentrated force.
- Angled nozzle: Offsets the blast direction so you can reach recesses, cavities, and complex geometries that a straight nozzle cannot be aimed into effectively.
Once the nozzle is fitted and locked, dial in your blast pressure — and the principle that governs every pressure decision is minimum effective pressure.
Use the lowest pressure that achieves the cleaning result. Starting too high risks substrate damage that cannot be undone — minimum effective pressure is always the right pressure.
As an orientation: delicate surfaces such as electronics or plastic moulds call for lower pressures (some MicroParticle-type systems operate from as low as 20 PSI), general industrial cleaning falls in a mid-range, and heavy coatings or thick deposits may require higher pressures up to 250–300 PSI on capable machines.
Set the dry ice feed rate at approximately 50% of maximum as your starting point, then adjust downward — more pellets per second is not automatically better cleaning, and the right balance of pellet quantity and air velocity maximises coverage while minimising waste.
For standoff distance, begin with the nozzle tip approximately 5–15 cm from the surface: closer increases energy density for tougher deposits, further reduces intensity for wider coverage or delicate substrates, which should always start at the far end of that range.
Confirm that the nozzle is fitted and locked, pressure and feed rate are set at your starting values, and standoff distance is noted — the unit is configured and ready for Step 3.
Step 3
Don PPE and prepare the work area

Key Insights
CO2 build-up is invisible — confirm ventilation first.
Hearing protection zones must be marked before starting.
Face shield, gloves, coveralls — all on first.
Establish exclusion zone; plan waste containment before blasting.
The equipment is configured and ready — but the trigger stays off until your PPE is on and the work area is controlled.
Each item below addresses a specific physical hazard present during dry ice blasting cleaning. Understand the hazard first; the protective measure follows logically.
- Face shield (not just safety glasses): Dry ice pellets and dislodged particles rebound at high velocity toward the operator during blasting. Safety glasses protect the eyes but leave the face exposed to ricocheting fragments. A full face shield covers the entire face and is the appropriate protection for this hazard.
- Hearing protection: Blast nozzle discharge generates very high noise levels. OSHA and HSE guidance identifies dry ice blasting as a high-noise operation requiring hearing protection. Sustained exposure at these levels causes irreversible hearing damage. Mark a hearing protection zone around the blast area before starting and ensure all personnel within it are protected.
- Cryogenic gloves and coveralls: Dry ice is -78.5°C. Direct skin contact causes cryogenic contact injury. Cryogenic or heavily insulated gloves are required any time you handle dry ice or operate the blasting unit. Coveralls or a blasting suit protect skin from particle impact during the blast itself.
- Respiratory protection (enclosed spaces): When dry ice sublimates, it releases CO2 gas. In enclosed or poorly ventilated spaces, CO2 accumulates. According to CDC NIOSH guidance, the IDLH (Immediately Dangerous to Life or Health) threshold for CO2 is 40,000 ppm. In confined spaces, supplied-air respiratory protection may be required.
The respiratory hazard deserves particular attention because it is the least detectable: CO2 is colourless and odourless at dangerous concentrations, so you cannot rely on your senses to detect build-up.
Never operate a dry ice blasting unit in a confined, unventilated area. CO2 accumulates silently and can reach dangerous concentrations before any sensory warning is possible. If working indoors, position the compressor outside and run a longer hose inside — this prevents adding compressor exhaust to the CO2 already building up from sublimation. Consult OSHA, HSE, or your local regulatory authority for ventilation requirements specific to your working environment.
With PPE on and ventilation confirmed, prepare the immediate work area before blasting begins.
Establish a clear exclusion zone around the blast area and mark it so that no unauthorised personnel enter while blasting is active.
The CO2 from dry ice blasting sublimates entirely to gas — it leaves no secondary waste. The only debris remaining after the clean is the dislodged contaminant itself, and the blast will scatter it.
Decide now where that debris will go and how it will be contained: sheeting, collection trays, or containment barriers placed before blasting begins make the post-clean clearance straightforward.
Run through this go/no-go check before pulling the trigger: full PPE in place (face shield, hearing protection, cryogenic gloves, coveralls, and respiratory protection where required); ventilation confirmed adequate; exclusion zone established and marked; waste containment in position.
All conditions met? You are ready to move to Step 4 and begin blasting.
Step 4
Apply the blast — technique, angle, and movement
Key Insights
Hold the nozzle perpendicular (70–90°) as default.
Slow, steady strokes clean better than rushed passes.
Use minimum effective settings; adjust in real time.
PPE is on, ventilation is confirmed, and the exclusion zone is set — you are ready to fire. Everything from this point depends on how you hold and move the nozzle.
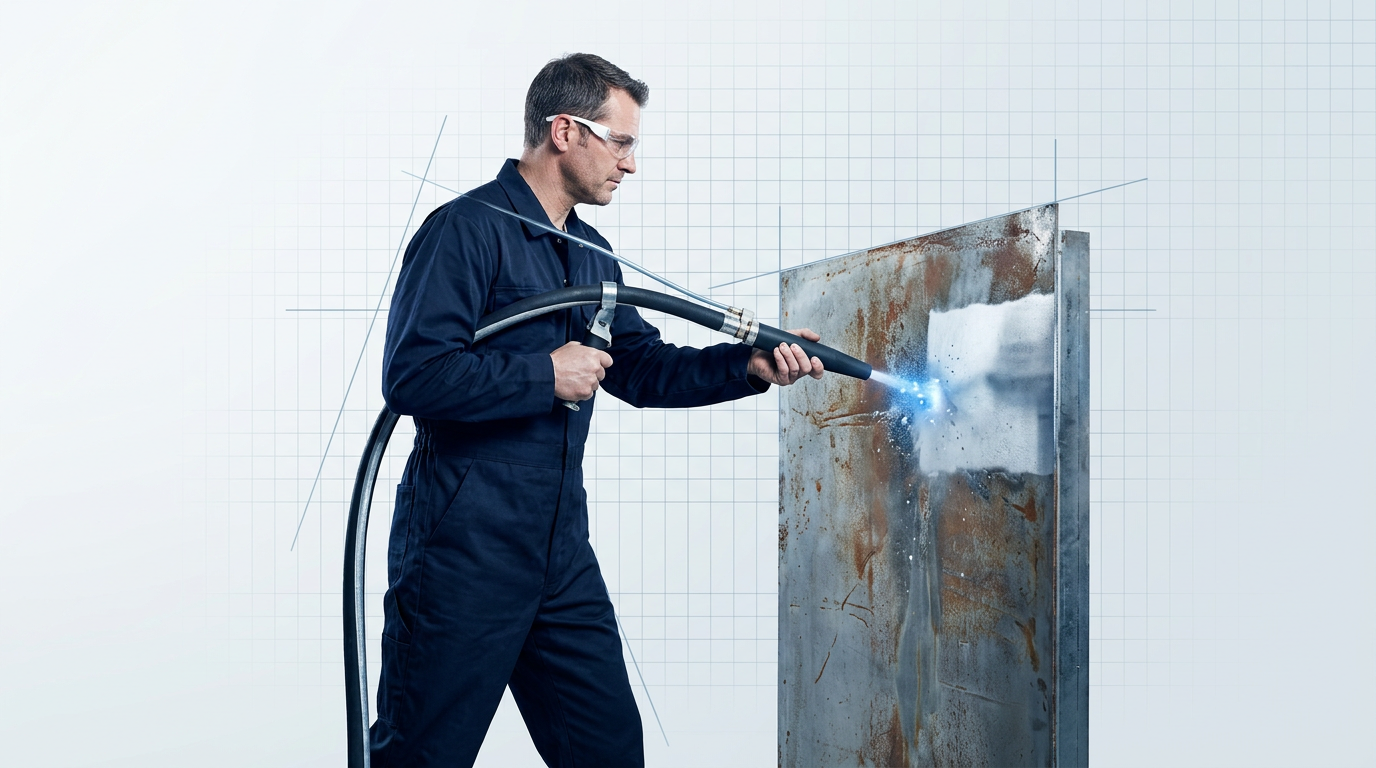
Start with the nozzle held perpendicular to the surface — roughly 70 to 90 degrees. This angle delivers the maximum energy directly at the contaminant-substrate interface, which is where you need it.
When working over a thicker deposit, tilt the nozzle to a slight angle rather than staying fully perpendicular — this helps the pellet stream penetrate underneath the contamination layer rather than simply striking its surface.
The standoff distance you set in Step 2 (typically 5–15 cm) is a starting point, not a fixed rule. Once you are blasting, treat it as a live control: move closer to increase energy density, or pull back if the substrate shows any unexpected response.
- Move slowly and steadily: Sweep the nozzle at a controlled, deliberate pace. The goal is to clean in a single, even stroke — not to hose down the surface with rapid passes. Excessive speed leaves uneven results.
- Manage the hose actively: Keep the blast hose as straight as possible and rest it over your shoulder rather than letting it coil or kink on the floor. A straighter hose maintains line pressure, reduces wear, and cuts operator fatigue on long runs.
- Adjust in real time: If cleaning is insufficient, raise pressure or feed rate incrementally. If the substrate shows surface marking, reduce settings immediately. The governing principle is minimum effective settings — not maximum power.
For recessed areas, internal corners, or complex geometries, switch to an angled nozzle and work methodically into the geometry rather than forcing a straight nozzle into position.
On sublimation, the CO₂ gas expands outward along the surface — so the cleaning effect reaches into crevices even where direct pellet impact is limited. You do not need line-of-sight contact into every recess.
The operators who get the best results from dry ice blasting cleaning are not the ones who run the highest pressure — they are the ones who control angle, standoff distance, and movement rate precisely. Start at minimum effective settings and adjust upward only when the surface tells you it is needed.
Step 5
What happens at the surface: the ICE mechanism
Key Insights
Impact, Cold, Expansion work in sequence to remove contamination.
CO2 sublimates fully — no blasting media remains.
You have just directed the nozzle, set your angle, and begun moving across the surface. Here is what is happening at the substrate in the milliseconds after each pellet lands — the full ICE sequence playing out in real time.
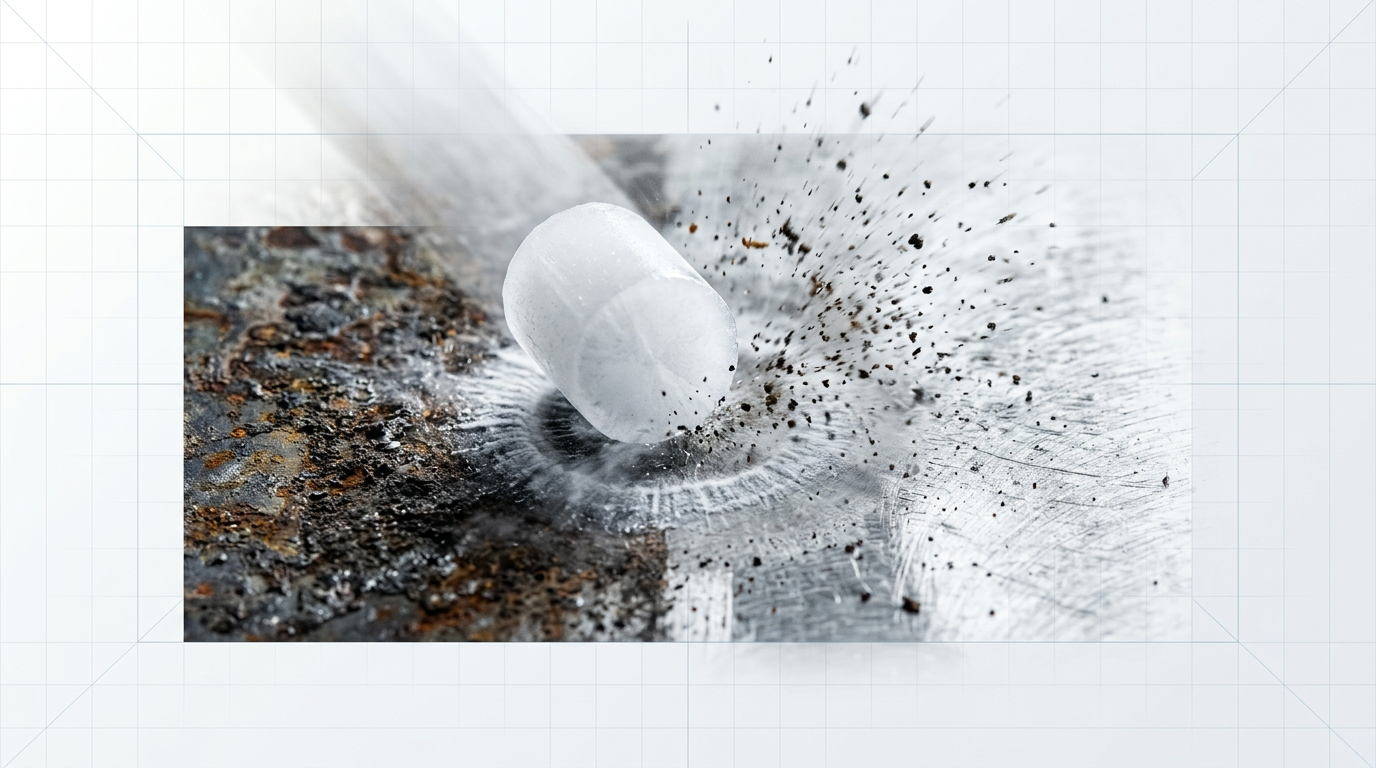
- Impact: kinetic energy fractures the bond: Pellets are accelerated to supersonic velocity by the compressed air stream and deliver a sharp kinetic blow to the contaminant on contact. Because dry ice sits at just 1.5–2 on the Mohs hardness scale — softer than virtually any substrate it will encounter — the energy transfers preferentially into the bond interface between contaminant and substrate, rather than into the base material itself. This is why the process can dislodge tough residues without gouging or profiling the surface beneath.
- Cold: thermal shock embrittles and delaminates: The pellet arrives at -78.5°C and cools the contaminant almost instantaneously. That rapid temperature drop embrittles the contaminant and induces micro-cracking along the bond interface. The thermal gradient between the now-cold contaminant and the warmer substrate beneath amplifies shear stress at that interface, driving delamination — a compounding effect on top of the mechanical fracture already initiated by impact.
- Expansion: sublimation ejects the contaminant: At the moment of impact, the solid CO2 converts directly to gas, expanding up to 800 times its original volume in a matter of milliseconds. This rapid volumetric expansion creates a high-pressure front at the interface between the fractured contaminant and the substrate — a micro-explosion that lifts the already-weakened contaminant clear of the surface. The first two mechanisms broke the bond; expansion provides the final ejection force.
The three mechanisms are simultaneous in practice, but they are causally sequential: Impact initiates fracture, Cold deepens it, and Expansion completes the removal.
This sequence is also what makes your parameter choices from Steps 2 and 4 meaningful rather than arbitrary. Pressure and feed rate govern the kinetic energy behind the Impact mechanism. Nozzle selection shapes where that energy is concentrated. The blast angle and movement rate you maintained in Step 4 determine how consistently the thermal and expansion effects are focused at the bond interface rather than dissipated across the surface.
Correctly configured, those controls keep the energy targeted at the contaminant — which is why the substrate beneath remains largely intact even when the process is removing material that has bonded tightly to it.
Once the CO2 expands to gas, it disperses into the atmosphere entirely. The only material left on or around the substrate is the dislodged contaminant itself — no spent media, no moisture, no chemical residue. Post-clean cleanup is therefore limited to clearing that debris alone, which is why Step 7 involves sweeping or vacuuming rather than any secondary waste processing.
Step 6
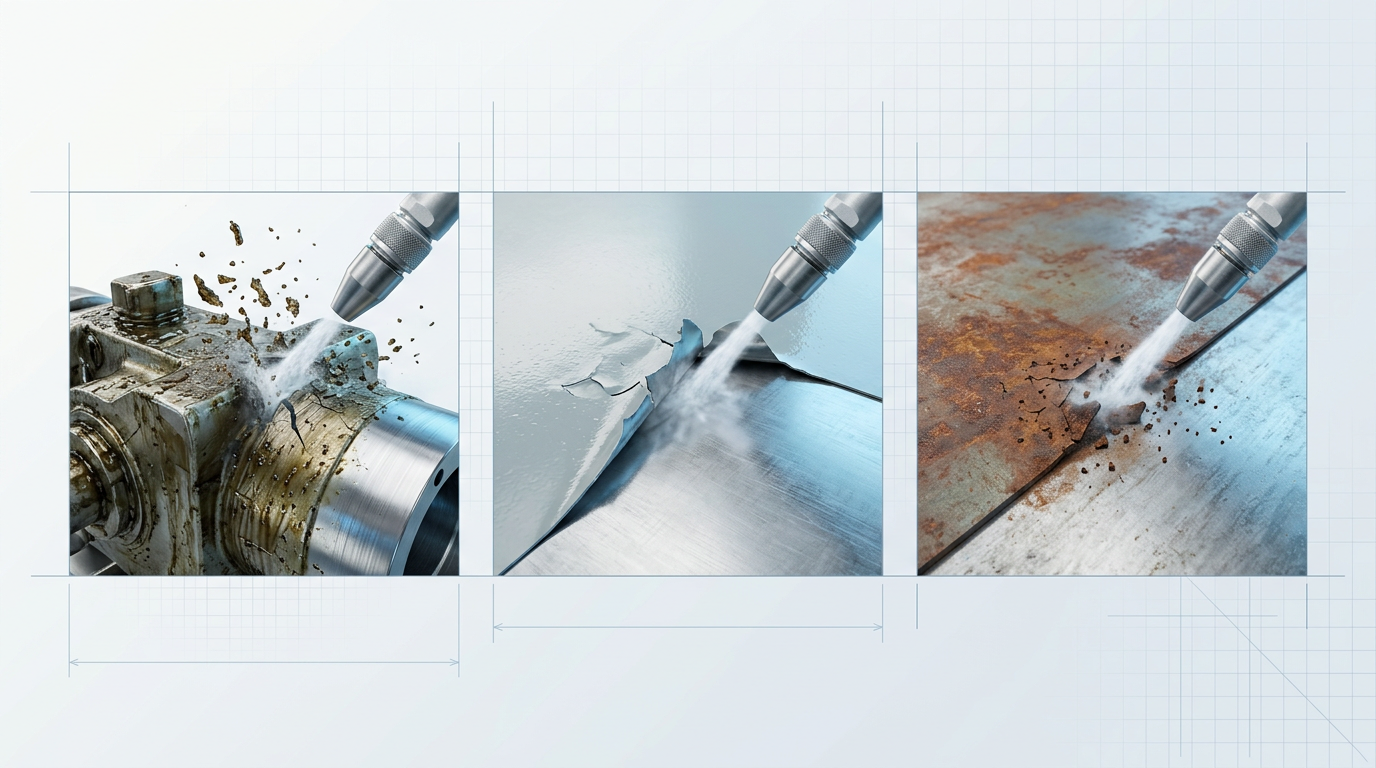
Adapt your approach for different contaminant types
Key Insights
Contaminant type determines which ICE mechanism dominates.
No profile created — check surface prep standard first.
Dry surface after mould clean prevents regrowth.
Clean equipment warm — amplifies thermal shock.
The ICE mechanism you studied in Step 5 does not behave identically across every contamination scenario. The dominant effect — whether thermal shock, kinetic impact, or CO2 expansion does most of the work — shifts depending on what sits between the pellet and the substrate, and your parameter decisions need to shift with it.
Work through the four contaminant categories below and adjust your approach before you pull the trigger.
- Grease and oil: The thermal shock element embrittles hydrocarbon deposits on contact — the cold pellet causes the greasy layer to contract sharply and fracture away from the substrate, with the expansion effect then lifting it cleanly. Because this mechanism is highly effective on soft deposits, start at the lower end of your pressure range and increase only if residue remains. No moisture or chemical is introduced, so the substrate is immediately ready for recoating or return to service.
- Paint and coatings: Here the thermal differential works at the adhesion interface: the coating contracts faster than the warmer substrate beneath it, breaking the bond between them. This is a different dynamic from grease removal, and it typically demands higher pressure — particularly for hard or chemically bonded coatings. For thick or multi-layer systems, plan for multiple passes from the start rather than assuming a single pass will clear everything.
- Rust and surface oxides: Thermal shock embrittles the oxide layer while kinetic impact and gas expansion dislodge it from the substrate. This works well for surface rust removal, but carry one important caveat into your planning: dry ice blasting does not create a surface profile the way abrasive blasting does. Before relying on it alone for rust removal, check the surface preparation standard required for your next stage — if a defined anchor profile is needed for coating adhesion, an additional or alternative method may be necessary.
- Mould and biological contamination: Kinetic impact combined with CO2 gas expansion dislodges mould spores from surfaces including porous materials such as wood and masonry. The critical procedural advantage is that the surface is left completely dry — no moisture is reintroduced. Because moisture drives mould regrowth, actively leverage this by moving to any subsequent sealing or treatment immediately after the clean.
Across all four contaminant types, one efficiency principle applies universally: the greater the temperature differential between the substrate and the pellet, the stronger the thermal shock effect and the faster the clean.
Where possible, clean plant and machinery while it is still warm from operation rather than waiting for it to cool. A warmer substrate amplifies the thermal differential, which accelerates contaminant removal and reduces the time and pellet volume needed to complete the job.
Step 7
Inspect the surface and clear contaminant debris

Key Insights
No media remains — vacuum debris, surface is ready.
Re-pass if inspection shows incomplete removal.
The blast is complete. As covered in Step 5, the CO2 has fully sublimated to gas — there is no blasting media on the surface, around the substrate, or pooled on the floor. The only material left to deal with is the contaminant that has been physically dislodged from the substrate.
Vacuum or sweep that debris away and collect it for appropriate disposal — its classification depends on what was removed, not on the dry ice blasting process itself.
Because no media remains and the surface is left completely dry and residue-free, there is no drying time before recoating, reassembly, or returning the asset to service.
Inspect the surface before calling the job complete
Inspect the entire treated area visually, working systematically across the surface rather than spot-checking.
- Uniform removal: Confirm the target contaminant has been lifted across the full treated area, with no missed patches at edges, recesses, or weld seams.
- Incomplete bond breaks: Look for areas where the contaminant has softened or partially lifted but not fully released — common with thick multi-layer coatings, heavily oxidised surfaces, and chemically bonded deposits.
- Substrate condition: Check that the substrate shows no signs of unintended surface damage. A clean result should reveal the base material without scoring, pitting, or discolouration beyond what was present before blasting.
If the surface will receive a coating and a defined preparation standard applies, verify the achieved cleanliness against that specification. Note that dry ice blasting does not create a surface profile in the way abrasive blasting does — if your coating specification requires a specific anchor profile for adhesion, confirm whether an additional preparation step is needed.
Thick deposits, multi-layer coatings, and chemically bonded contamination frequently require a second pass with adjusted parameters. If inspection reveals incomplete removal, the correct response is a re-pass — not increasing pressure on the original run, which risks substrate damage. Plan the re-pass with parameters that suit the remaining contamination, not those that suited the first pass.
Once inspection confirms full removal and the surface state matches the downstream requirement, the job is complete — the surface is ready for its next stage without any further preparation.
For operators evaluating their options more broadly: some applications where CO2 pellet supply logistics, noise levels, or enclosed-space ventilation requirements are ongoing constraints lead practitioners to also consider laser cleaning as an alternative method worth assessing.
Conclusion
Dry ice blasting cleaning: what you now know
Dry ice blasting cleaning is a controllable process — the results you get are a product of the setup decisions you make, not of the method being unpredictable.
You now have what you need to evaluate it: whether your contaminant type and substrate suit it, whether your site can support the compressed air supply, and whether pellet logistics and noise levels are workable for your operation.
Where those constraints don't stack up, laser cleaning is worth considering — no consumables, no pellet supply to manage, no CO2 build-up in enclosed spaces. Woodrow Scientific Limited's ELASER/ELASER-RHZ is the place to start that conversation.
Dry ice blasting cleaning: frequently asked questions
Answers to the most common questions about dry ice blasting cleaning — what it costs, where its limitations lie, and how it performs on practical edge cases.
Dry ice blasting has six real trade-offs worth understanding before adopting it. Supply logistics: solid CO2 pellets sublimate during storage and cannot be stockpiled indefinitely, so dry ice supply must be planned and managed per job. Noise: compressed-air discharge from a blast nozzle generates high noise levels — OSHA data for abrasive blasting operations indicates air discharge from a blast nozzle reaches 112–119 dB(A), and hearing protection is mandatory. CO2 build-up: as the dry ice sublimates, CO2 accumulates in the surrounding atmosphere. In enclosed or poorly ventilated spaces, this creates a genuine asphyxiation hazard requiring ventilation planning or supplied-air respiratory protection. No surface profiling: unlike abrasive blasting, dry ice blasting does not create an anchor pattern on the substrate. Where a specific surface profile is required for coating adhesion, the method alone may not meet the specification. Multiple passes for thick coatings: heavily bonded or multi-layer coatings may require multiple passes rather than a single clean, which affects time and cost estimates. Capital cost: professional-grade equipment carries a significant upfront cost, and dry ice pellets are a consumable that must be purchased fresh for every job — they sublimate completely and cannot be recovered after use.
There is no single figure — dry ice blasting costs vary significantly by equipment type, application, and whether you are purchasing equipment or commissioning a professional service. The key cost drivers are worth understanding before making that decision. Equipment: professional-grade dry ice blasters range from approximately $17,000 to $55,000 for new machines, depending on features such as particle control systems and IoT capability. Budget machines exist at lower price points but typically carry higher operating costs over time due to greater dry ice consumption. Dry ice as a consumable: dry ice sublimates completely on every job and cannot be recovered. Pellet costs generally range from $0.30 to $3.00 per pound, and consumption rates vary from around 0.7 lbs per minute for MicroParticle systems to 2.5 lbs per minute for standard pellet systems — so operating costs accumulate quickly at scale. Compressed air: standard pellet blasting systems require around 100 cfm at 80 psi, which typically means an industrial compressor — either a capital cost or a rental cost to factor in. Professional services: if you are hiring a dry ice blasting contractor rather than buying equipment, pricing varies by project scope, access difficulty, and application. Obtain quotes specific to your application rather than relying on generalised figures.
Dry ice blasting cleaning results last as long as the surface remains uncontaminated in its operating environment. The process removes the contaminant completely, but it does not prevent re-contamination — no protective layer is applied, and the cleaned substrate will be exposed to the same operating conditions as before. If longer-lasting cleanliness is needed, the same measures apply as with any cleaned surface: coatings, sealants, or operational controls to limit re-exposure. For maintenance applications where re-contamination is expected — industrial equipment, mould cleaning, production machinery — dry ice blasting is best understood as a periodic maintenance process rather than a one-time fix, and should be scheduled accordingly.
At correct parameters, dry ice blasting is non-abrasive and leaves the substrate intact. Dry ice has a Mohs hardness of approximately 1.5–2 — comparable to chalk — so at appropriate settings it removes the contaminant without abrading the underlying material. Damage is possible, but it results from incorrect parameter choices rather than from the process itself. Three specific conditions create risk: blast pressure set too high for the substrate material; the wrong nozzle selected for the surface geometry; or standoff distance held too close, concentrating energy beyond what the substrate can absorb. Controlling those three variables — pressure, nozzle selection, and standoff distance — is what protects the substrate. This is why the standard practice is to start at lower pressure and increase incrementally rather than opening at full power. For particularly sensitive substrates such as electronics, thin plastics, or delicate components, lower pressures and smaller particle sizes are available, allowing the process to be tuned accordingly.
No — the CO2 sublimates completely to gas on impact, leaving no blasting medium on or around the surface in any form. There is nothing to sweep up, dispose of, or treat from the blasting media itself. The only material remaining after a dry ice blasting clean is the dislodged contaminant, which falls away from the surface and is vacuumed or swept up for disposal. That contaminant is the only waste stream. The surface itself is left dry and residue-free, with no drying time required before recoating, reassembly, or returning the asset to service. This contrasts with water-jetting, which introduces moisture that must be managed, and chemical stripping, which leaves chemical residue requiring neutralisation before the surface can be used.