
Introduction
If you're here, you already know aluminium needs cleaning before you weld it — this guide tells you exactly how, and in what order.
Most aluminium weld defects trace back to cleaning failures, not to machine settings or technique. Getting the preparation right is the single most controllable variable in the quality of your weld.
This guide covers the complete sequence: from the first degreasing pass through to post-weld cleanup, because the order of steps is not arbitrary — skipping or reversing them causes real, identifiable defects.
TL;DR
Cleaning aluminium for welding is a sequenced procedure where each step depends on the last. Done correctly and in order, it is the single biggest factor separating a sound weld from a defective one — more so than equipment or technique.
This article covers:

Pre-weld degreasing: oils and hydrocarbons
Oxide removal and method selection
Handling and storage before welding
Post-weld cleaning techniques
Cleaning failures and weld defects
What is aluminum weld cleaner and why does sequence matter?
Aluminium arrives at your bench carrying two completely different types of contamination, and the mistake most people make is treating them as one problem.
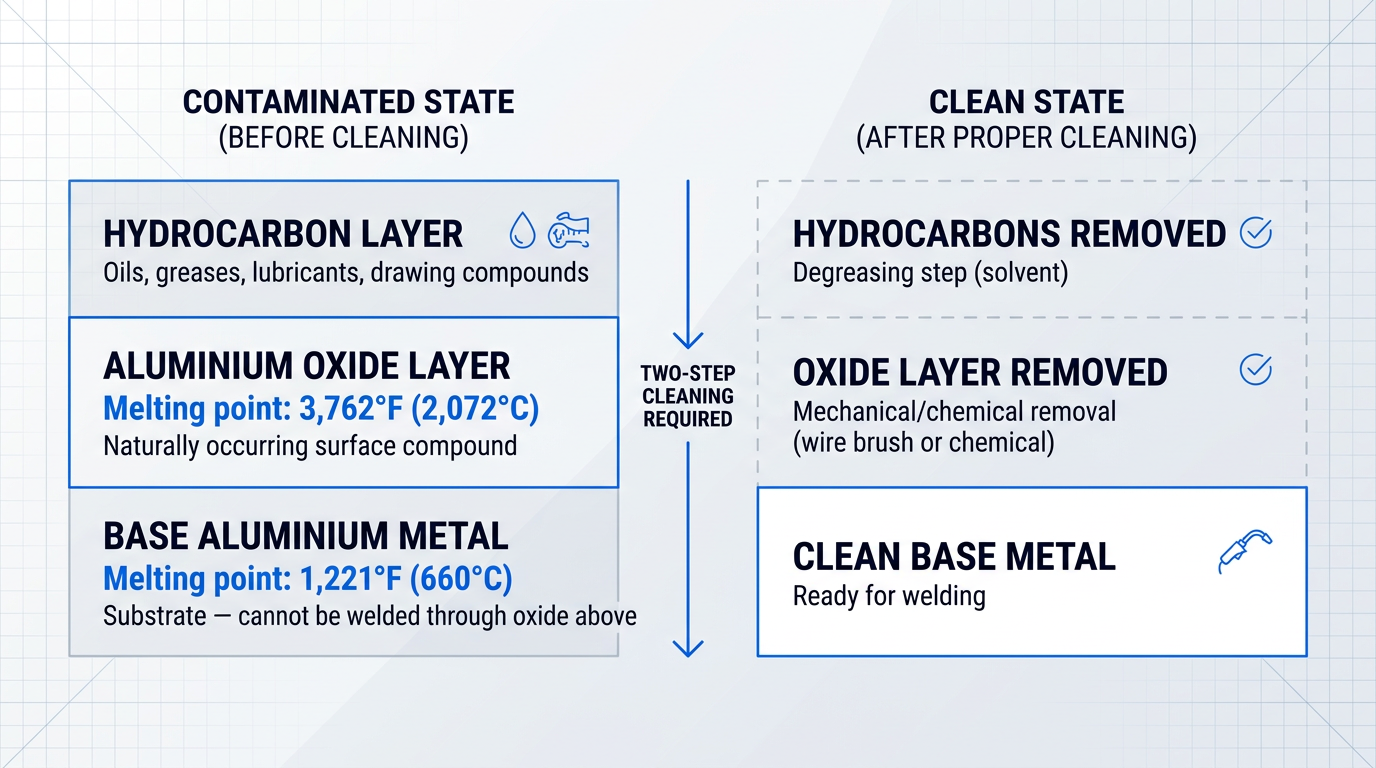
Two contamination types, two separate problems
The first type is hydrocarbon contamination: oils, greases, lubricants, drawing compounds, cutting fluids, and anything left behind by handling.
The second is the aluminium oxide layer, a naturally occurring surface compound that forms the instant bare aluminium is exposed to air — you cannot prevent it, only remove it.
These two contaminants require entirely different removal methods, and no single cleaning pass addresses both.
Why the oxide layer cannot be welded through
The oxide layer is not just a surface film — it is a welding obstacle with a melting point of approximately 3,762°F (2,072°C), while the aluminium base metal beneath it melts at approximately 1,221°F (660°C).
That gap is not marginal — it means the arc will destroy the base metal long before it burns through the oxide sitting on top of it.
This is why the oxide must be mechanically or chemically removed before welding, not relied upon to melt away during the weld pass.
Why the sequence is non-negotiable
Degreasing must come before oxide removal — not after, and not at the same time.
If you wire-brush first, the mechanical action of the brush drives hydrocarbon contamination deeper into the soft aluminium surface, and the brush itself picks up those oils in the process.
A contaminated brush then redistributes oil across the surface on every subsequent stroke — so you have made both the metal and the tool unsuitable for clean welding simultaneously.
Brushing before degreasing embeds oils deeper into the surface and contaminates the brush. From that point, every stroke spreads contamination rather than removing it — the sequence is not a convention, it is the reason the process works.
Re-oxidation starts immediately after cleaning
A freshly cleaned aluminium surface does not stay clean — the oxide layer begins reforming the moment it is removed, and the clock starts immediately.
This means cleaning should happen as close to welding as possible; leaving cleaned aluminium sitting overnight before welding is not a safe margin.
What to gather before you begin
Have everything on this list within reach before you start — stopping mid-process to find a tool introduces handling time and re-contamination risk.
- Stainless steel wire brush (aluminium-only): Dedicated to aluminium and never previously used on steel or other metals. Cross-contamination from a shared brush deposits iron particles into the surface.
- Lint-free cloths or cheesecloth: Not shop rags. Lint and fibres left on the surface become contamination. Use a fresh cloth for each wipe — never double-dip.
- Appropriate solvent: Acetone is the most common choice. Toluene and dedicated aluminium degreasers are also suitable. Use in a well-ventilated area.
- Clean nitrile or chemical-resistant gloves: Bare hands transfer skin oils directly onto the surface. Gloves must be clean — contaminated gloves are no better than bare hands.
The discipline around tool hygiene is where many otherwise careful procedures fall apart: a wire brush previously run across mild steel will deposit iron particles into the soft aluminium surface, creating contamination sites that persist through the weld.
Similarly, a cloth used more than once, or dipped back into a solvent container after touching the metal, redistributes the oils it just lifted rather than removing them — one cloth, one wipe, discard.
With the logic of the process clear and your materials ready, the first action is degreasing — removing the hydrocarbon layer before the brush ever touches the surface.
Step 1
Degrease the aluminium surface
Key Insights
Use acetone — it dissolves oils and evaporates residue-free.
Three checks: no sheen, no residue, no smell.
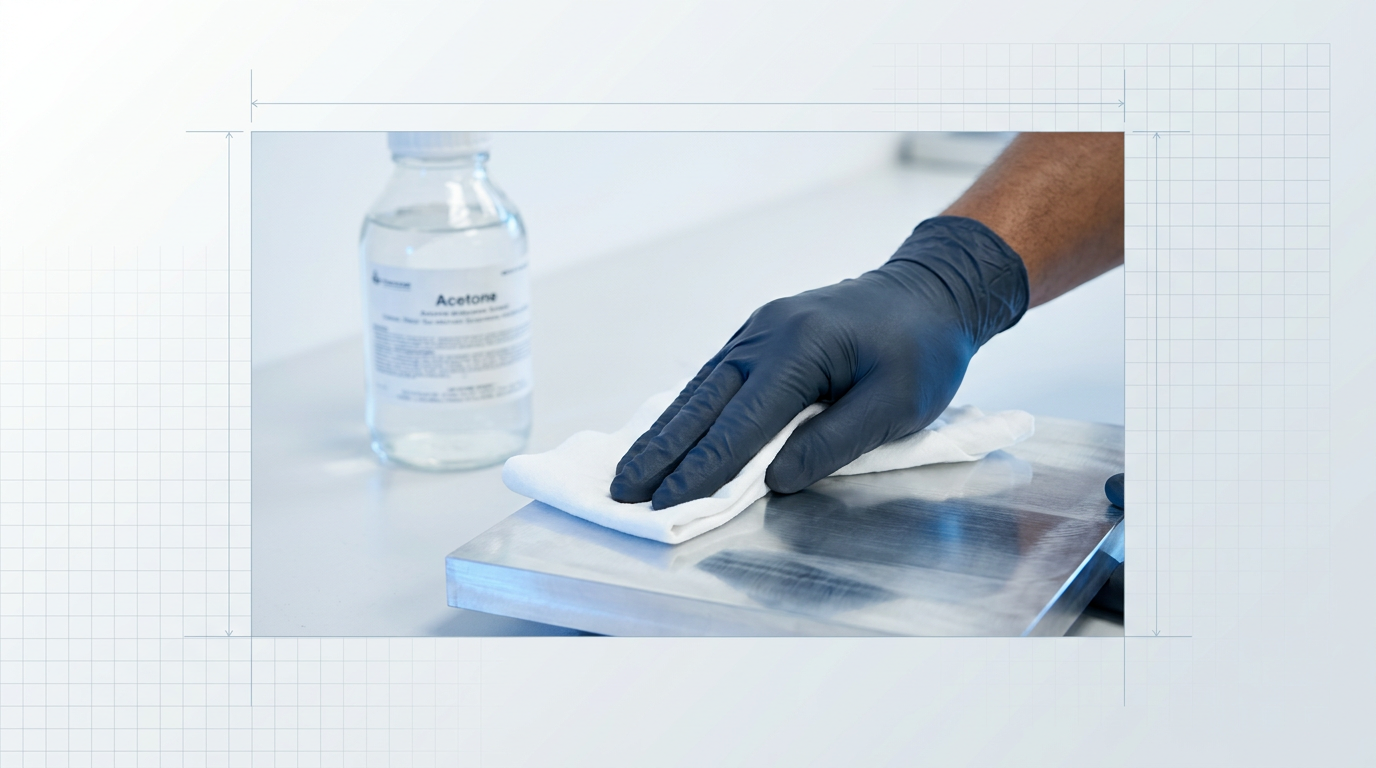
Reach for acetone or toluene — these are the right solvents for aluminium degreasing. Both cut through oils, drawing compounds, and cutting fluids effectively, and acetone has the added advantage of evaporating cleanly without leaving any residue behind.
- Acetone: The preferred choice. Dissolves oils and hydrocarbon contamination thoroughly and evaporates without residue. Effective against heavier contamination like cutting fluids.
- Toluene: A strong alternative where acetone is not available. Effective against similar contamination types, though it evaporates more slowly.
- Isopropyl alcohol (IPA): Avoid for this application. IPA spreads oils across the surface rather than lifting them, and will not cut through heavier contamination such as drawing compounds or cutting fluids.
- Chlorinated solvents (e.g. trichloroethylene, methylene chloride): Do not use near the welding arc. These solvents can decompose under arc heat to produce toxic gases. Use acetone or toluene instead.
Use a clean, lint-free cloth or cheesecloth — not a shop rag.
Shop rags carry residual oils and soap residues from previous use, and wiping with one transfers that contamination straight onto the surface you just cleaned.
Saturate the cloth with solvent and wipe the joint area thoroughly, including the opposite face of the joint. Contamination migrates through the material under welding heat, so cleaning only the top face is not enough.
Once you have wiped the surface, do not reach for compressed air to finish the job. Workshop compressors introduce moisture and compressor oil into the air stream, recontaminating the surface immediately.
Acetone and toluene are flammable — keep them away from sparks and open flame, and ensure good ventilation. Do not proceed to oxide removal or strike an arc until the solvent has evaporated completely. Arcing over a wet surface is a fire risk and drives contamination into the weld.
Before advancing to Step 2, run through this three-point check to confirm the surface is genuinely ready.
- No oily sheen: Tilt the workpiece under your light source. A hydrocarbon film catches the light as a faint iridescent sheen. If you see one, wipe again with a fresh cloth.
- No visible residue: The surface should look uniformly clean — no smears, streaks, or deposits. Any visible residue means the cloth was not clean or the solvent has not done its job.
- No solvent smell: A lingering solvent odour means evaporation is not complete. Wait until the smell is gone before proceeding — this takes seconds in good ventilation, longer in still air.
Once all three checks pass, the surface is degreased and ready for oxide removal in Step 2.
Step 2
Remove the oxide layer
Key Insights
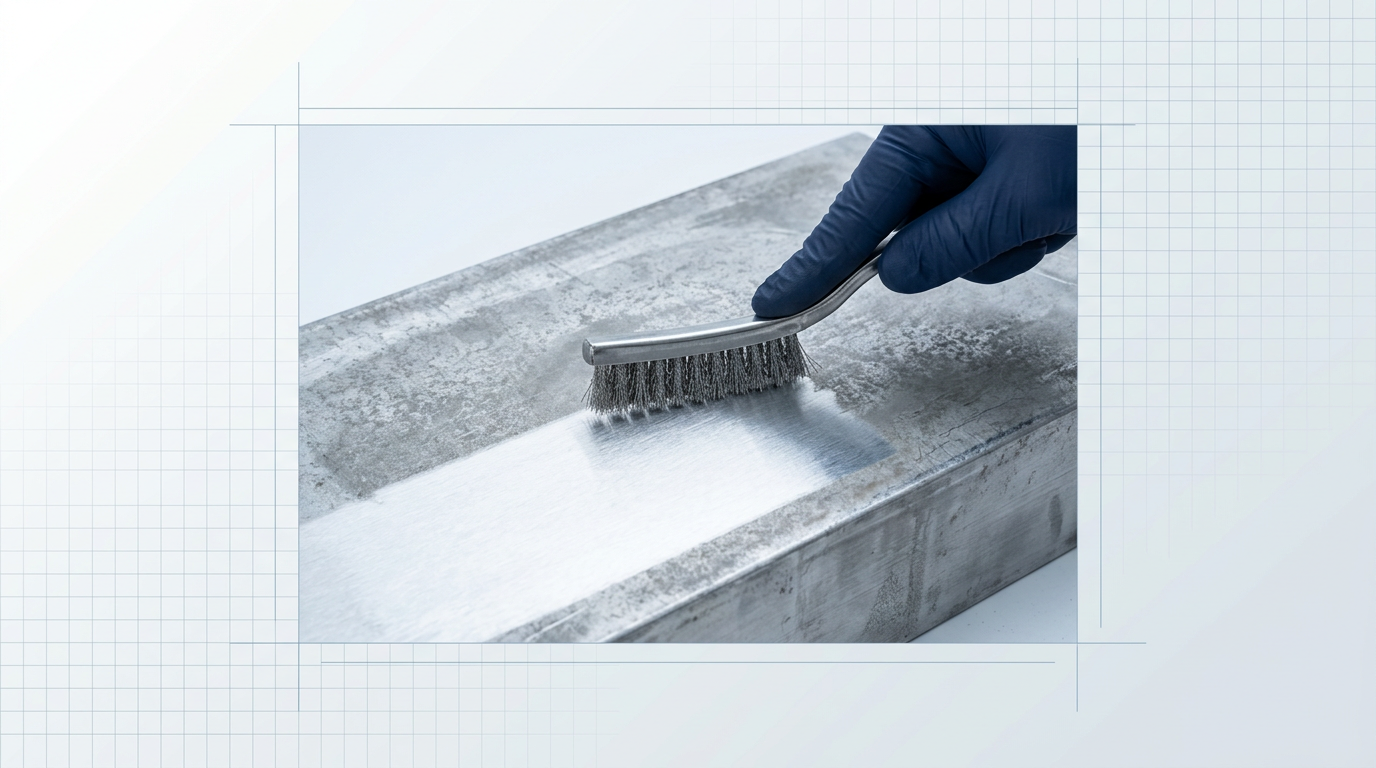
Brush aluminium-only, one direction, light pressure.
Bright and matte surface — no grey patches.
With the solvent fully evaporated and the surface hydrocarbon-free, you are ready for the second stage: removing the oxide layer.
Choose your method based on the geometry, the severity of oxidation, and your operating environment.
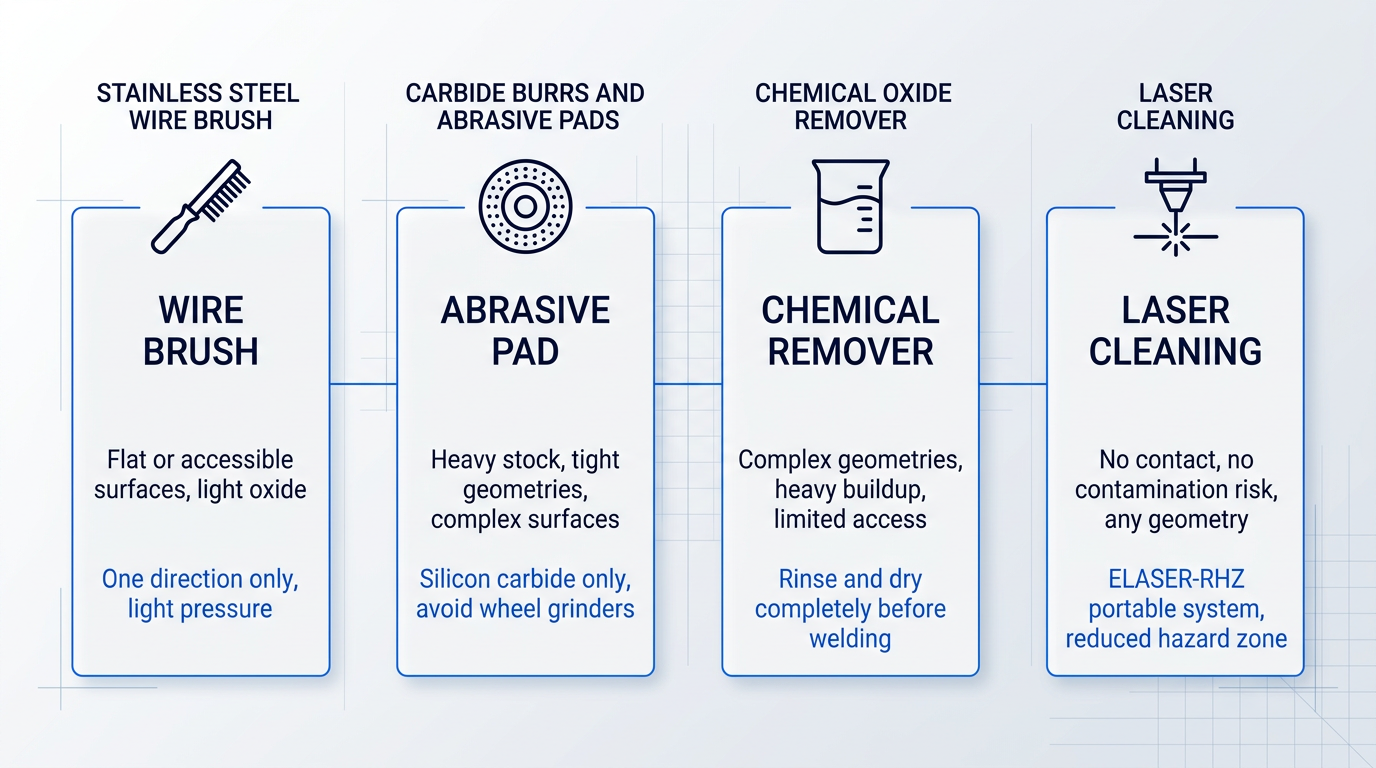
Method 1: Stainless steel wire brush
Use a brush dedicated exclusively to aluminium — never one previously used on steel or other metals.
A brush that has touched steel carries embedded iron particles; pressed into soft aluminium, those particles become contamination inclusions that survive welding.
- Brush in one direction only: Unidirectional strokes draw oxides away from the surface. Back-and-forth motion redistributes them rather than removing them.
- Use light pressure: Excessive pressure burnishes the oxide into the aluminium rather than lifting it — the surface looks clean but the contamination is still there, now embedded.
- Choose flexible, non-knotted stainless bristles: Knotted or carbon-steel bristles introduce the same cross-contamination risk as a previously cross-used brush.
For most flat or accessible surfaces, a correctly used dedicated stainless wire brush is all you need.
Too much pressure does not clean harder — it presses the oxide layer into the aluminium surface. The part looks bright but the contamination is still there, now embedded. Use light, consistent strokes in one direction only.
Reach for carbide burrs or abrasive pads when working with heavy stock, tight geometries, or weld joints a wire brush cannot reach.
Method 2: Carbide burrs and abrasive pads
Abrasive selection matters more than most operators realise: using the wrong pad type is not neutral — it actively adds contamination.
- Use silicon carbide abrasives: Silicon carbide cuts through aluminium oxide without adding contamination. Aluminium oxide abrasives are counterproductive — they deposit the very material you are trying to remove.
- Avoid wheel grinders: Grinding wheels can embed abrasive particles into the soft aluminium surface, creating inclusions that compromise weld quality.
Alkaline or acid-based oxide removers are the right choice for complex geometries and heavy oxide buildup where mechanical access is limited.
Method 3: Chemical oxide removers
After etching, rinse thoroughly and dry completely before welding — residual by-products from the chemical reaction will introduce porosity if the arc starts on a contaminated surface.
Ensure adequate ventilation and appropriate PPE when handling acid or alkaline cleaners.
Method 4: Laser cleaning
Laser cleaning removes oxides and contaminants without abrasives, chemicals, or any contact with the surface — eliminating the risk of embedding foreign material into the aluminium.
The ELASER-RHZ from Woodrow Scientific is a portable laser cleaning system built for open workshop use: its world-first reduced-hazard-zone technology collapses the laser hazard zone to a fraction of conventional size, enabling cleaning in mixed-use facilities without sealing off the area.
Verification: confirm the surface is ready
A correctly de-oxidised aluminium surface looks bright and matte with no grey or dark discolouration — any remaining grey patches mean oxide was not fully lifted.
Once de-oxidised, the surface begins reforming oxide within hours, so move to the next step as quickly as possible.
Step 3
Handle and store the cleaned part correctly before welding
Key Insights
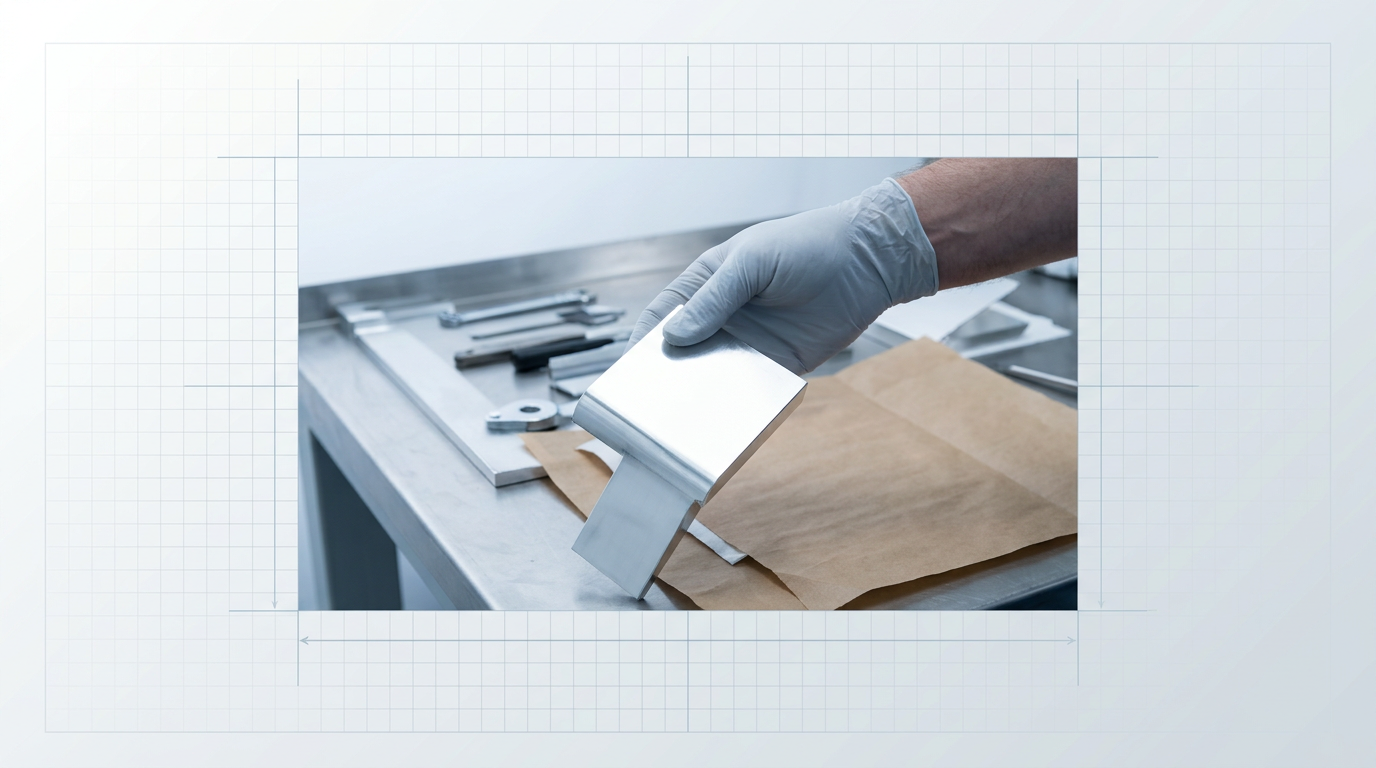
Gloves on — bare hands recontaminate instantly.
Re-clean if days have passed.
Your surface is clean — now keep it that way. Everything from this point until the arc is struck is a contamination risk, and the actions below are what separates a clean weld from a porous one.
- Wear clean nitrile or lint-free gloves: Put them on the moment cleaning is complete and keep them on until the part is in the welding position. Bare skin deposits oils and moisture instantly, reintroducing the hydrocarbon contamination you just removed.
- Cover the joint area with brown kraft paper: If welding cannot start immediately, lay kraft paper over the prepared joint. It blocks airborne grit, dust, and workshop contamination from settling onto the surface while you wait.
- Store cleaned pieces vertically: Never stack or lay cleaned aluminium flat against other surfaces. Pieces stored in contact with each other trap condensation between them — moisture you will not see until it shows up as porosity in the weld.
- Bring cold aluminium to room temperature before welding: Allow at least 24 hours for aluminium coming from a cold store or unheated area to equalise to workshop temperature. Cold metal in a warm room develops condensation on the surface, and that moisture goes straight into the arc.
- Keep filler metals covered until the moment of use: Store TIG rods in a sealed case and keep MIG wire spools covered. Filler metal oxides introduced into the weld puddle bypass all the surface preparation you have just completed.
The handling rules above protect the surface in the short term, but there is a harder time limit you need to know.
Aluminium re-oxidises rapidly after cleaning — a substantial oxide layer reforms within 24 hours. The rule is simple: weld as soon as possible after cleaning. If more than a few days have passed, go back to Step 2 and re-clean before welding.
Follow these five practices consistently and the cleaning work from Steps 1 and 2 will hold right up to the moment you strike the arc.
Step 4
Clean the Weld Area After Welding
Key Insights
Post-weld cleaning affects corrosion resistance and coating adhesion.
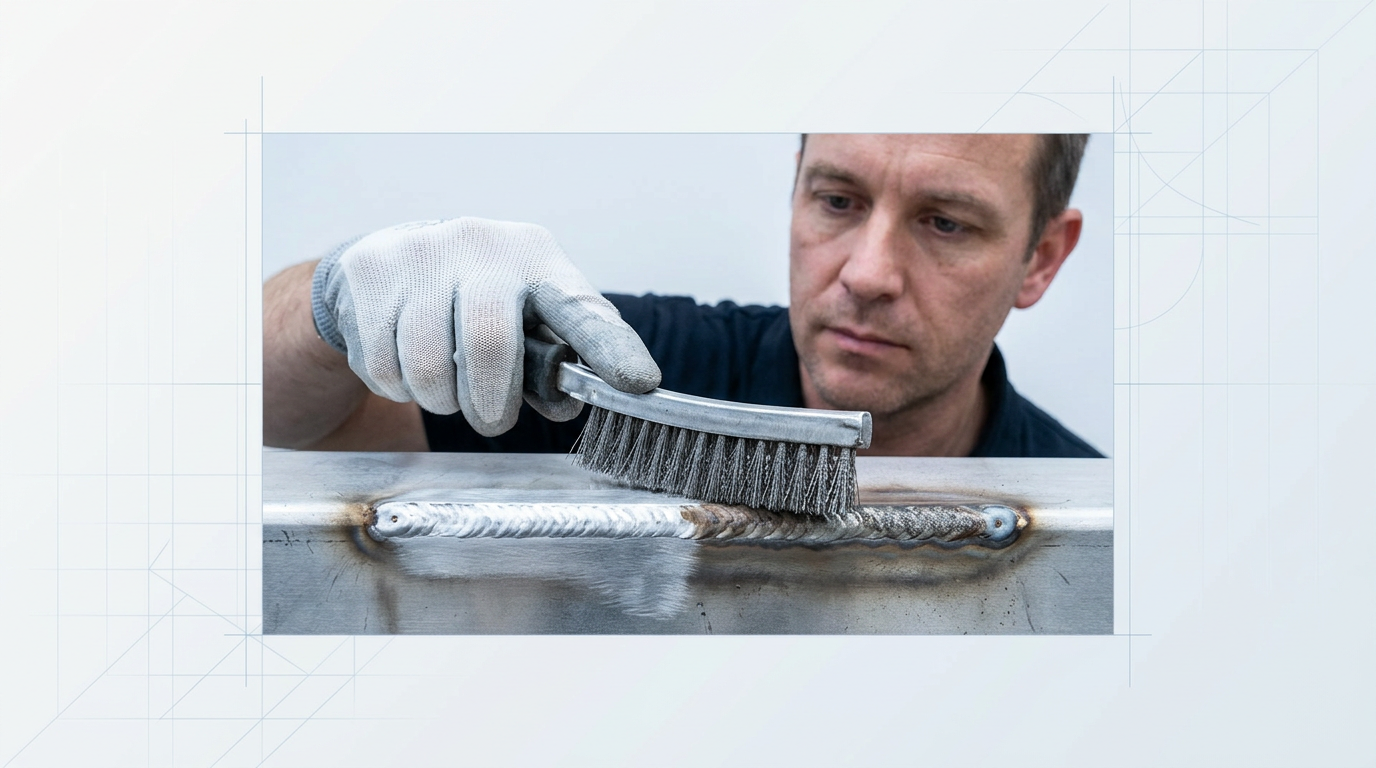
Brush every pass — trapped oxides cause porosity.
The weld is done — but the job is not. Oxide residue and weld discolouration left on a finished aluminium weld are not cosmetic issues you can ignore: they impair corrosion resistance and will cause adhesion failure in any subsequent coating, anodising, or surface treatment.
Skilled fabricators treat post-weld cleaning as a functional requirement, not a tidy-up. This step covers how to do it properly.
Mechanical Post-Weld Cleaning
Wire-brush the weld bead and the surrounding heat-affected zone using a dedicated stainless steel wire brush or clean abrasive pad.
The same tool-hygiene discipline from Step 2 applies without exception here: aluminium-only tools, clean and uncontaminated. Using a brush that has touched steel will embed iron particles into the surface — the principle is the same whether you are cleaning before or after the weld.
- Aluminium-only brush: Never use a brush shared with steel or other metals — cross-contamination embeds foreign particles into the weld surface.
- Clean abrasive pad: If using a scotch-brite or abrasive pad, ensure it is fresh and has not been used on any other material.
- Work the heat-affected zone too: Oxide discolouration extends beyond the bead itself — brush the surrounding parent metal as well as the bead.
Mechanical cleaning is the standard approach for most workshop situations and is sufficient for parts that will not undergo further surface treatment.
Interpass Cleaning for Multi-Pass Welds
If you are laying multiple passes, cleaning is not just a final step — it is a mid-weld action that must happen between every pass.
Oxides form rapidly on a hot aluminium bead surface. If you deposit the next pass before wire-brushing the completed one, those oxides become trapped between layers — and interpass porosity is the result. Wire-brush each completed bead as soon as it is cool enough to handle, before striking the next arc.
This applies to every pass in the sequence, not just the final one. Do not wait until the weld is complete to clean — by then the damage is already inside the joint.
Chemical Post-Weld Cleaning
For parts heading into anodising, powder coating, or other surface treatments, mechanical brushing alone may not achieve the oxide removal those processes require. Alkaline or acid pickling solutions provide a more thorough chemical route.
Apply the pickling solution according to the manufacturer's instructions, then rinse thoroughly with clean water and allow the part to dry completely before any further treatment. Residual pickling chemistry left on the surface will itself cause corrosion and adhesion problems — rinsing is not optional.
Ensure adequate ventilation when working with pickling solutions, particularly acid-based products.
Laser Cleaning for Post-Weld Oxide Removal
Where surface finish consistency matters — or where parts will go directly into a coating or anodising line — laser cleaning offers a precise, repeatable method for post-weld oxide and discolouration removal with no abrasives, no chemicals, and no risk of embedding foreign material into the surface.
The ELASER from Woodrow Scientific performs this task directly in the workshop. Its patented Reduced Hazard Zone (RHZ) technology collapses the laser hazard zone to a fraction of conventional size, so you can clean in an open workshop environment without sealing off the area — a practical advantage that conventional laser cleaners cannot offer.
At under 3 kg, the handheld scanner reaches up to 50 m from the unit, making it genuinely single-operator and portable across a workshop floor. WSL is the only UK-based laser cleaning manufacturer, designing and building its machines in-house — which matters when you need support, spares, or a machine that can be adapted to your application. Many products in this category are rebadged imports with no in-house engineering behind them.
For production environments running consistent batch volumes, an automated laser cleaning cell can deliver the same post-weld cleaning standard across every part, every cycle, without manual intervention.
Verification: What a Clean Post-Weld Surface Looks Like
The step is complete when the weld bead and the surrounding metal are uniform in colour, free of dark discolouration, oxide scale, and flux residue. There should be no dull grey patches, no brown or black staining, and no visible surface contamination.
If discolouration remains after mechanical cleaning, revisit with a fresh brush or move to a chemical or laser method — a discoloured bead is a bead that has not been fully cleaned.
Conclusion
A clean surface is every sound weld's foundation
If you have worked through the full sequence correctly, surface preparation is no longer a variable in your weld quality equation — it is a solved problem.
Any porosity, cracking, or lack of fusion that appears now points toward settings or technique, not cleaning, and that is a far more tractable place to be.
From here, the questions that matter are filler metal selection, shielding gas choice, and welding parameter setup — the natural next chapter of the same practice.
Frequently asked questions
Common questions about cleaning aluminium for welding, covering prohibited materials, post-weld methods, defect causes, re-oxidation timing, and troubleshooting stubborn contamination.
Avoid shop rags (they transfer oils and soap residues), compressed air (introduces moisture and compressor oil), chlorinated solvents near the arc (they form toxic gases when heated), isopropyl alcohol as a primary degreaser (spreads rather than lifts heavy hydrocarbon contamination), aluminium oxide abrasives (deposit the very contaminant you are trying to remove), and wire brushes previously used on steel (iron particles embed into the soft aluminium surface and create inclusion sites in the weld). The underlying principle is consistent: the wrong tool does not simply fail to clean — it actively makes the surface worse and harder to recover.
For mechanical post-weld cleaning, use a dedicated stainless steel wire brush or clean abrasive pad on the bead and heat-affected zone — the same tool-hygiene rules apply as pre-weld: aluminium-only, never previously used on steel. For chemical post-weld cleaning, alkaline or acid pickling solutions dissolve oxide residue and support corrosion resistance; rinse and dry thoroughly before any further treatment. Post-weld cleaning is not cosmetic. Oxide residue and weld discolouration left in place impair corrosion resistance and cause adhesion failure in subsequent coatings, anodising, or surface treatments. For multi-pass welds, wire-brush each completed bead immediately while it is still accessible — oxides form rapidly on the hot bead surface, and laying the next pass over them is one of the primary causes of interpass porosity.
Welding dirty aluminium produces real, identifiable defects — not vague quality issues. Hydrocarbons present at the arc break down into hydrogen, which enters the weld pool and causes porosity. An un-removed oxide layer (melting point approximately 3,762°F versus aluminium's 1,221°F) resists fusion and produces lack-of-fusion defects at the weld interface. Contamination introduced by the wrong tools — iron particles from a steel brush, abrasive grit from grinding — causes inclusions inside the weld. None of these defects are reliably visible on the surface, which is why post-weld inspection is not optional on structural work. Skipping degreasing is the single most common cause of porosity in aluminium welding.
Not long. Aluminium re-oxidises rapidly after cleaning, with the majority of maximum oxide thickness reforming within 24 hours. Weld as soon as possible after cleaning — ideally within hours, not days. If more than a few days have elapsed between cleaning and welding, re-clean the surface before proceeding. Moisture and airborne contamination accumulate on a cleaned surface over time as well. Handling with bare hands, leaving the part exposed to the shop environment, or storing without protection all shorten the effective clean window further.
Start by repeating degreasing with fresh solvent and a completely clean cloth. A cloth that has already picked up contamination will redistribute it rather than remove it — this is a common reason standard cleaning appears to fail. If heavy oxide buildup is not shifting with wire-brushing, escalate to a chemical oxide remover (alkaline or acid cleaner designed for aluminium), followed by thorough rinsing and drying before welding. For deeply embedded contamination or surfaces smeared by grinding or burnishing, mechanical removal with a carbide burr is appropriate — then re-degrease and re-brush in the correct sequence. If contamination persists after all of the above, start over with fresh material where possible. Some surfaces are too contaminated to recover reliably, and the effort of starting over is always less than the cost of a rejected weld or a rework.
No. WD-40 does not remove the aluminium oxide layer and should not be used in weld preparation. It is a hydrocarbon-based product — applying it to aluminium before welding introduces an oil and hydrocarbon residue that itself needs to be removed before the surface is weld-ready. It does not chemically attack or dissolve aluminium oxide. For oxide removal, use a dedicated stainless steel wire brush or silicon carbide abrasives (mechanical methods), or an alkaline or acid cleaner formulated for aluminium (chemical method) — always after degreasing is complete.